
Overview of Drupal SiteTran Integration
This guide offers a straightforward, step-by-step approach to make your Drupal website multilingual in just a few minutes. Anyone can follow along successfully, no technical background needed.
Expanding your online business's reach to a global audience has never been easier for Drupal users thanks to SiteTran. Whether you're looking to attract new customers from different backgrounds or enhance the user experience for your current international clientele, this guide will walk you through the entire process.
Let's dive into the world of website translation and unlock new possibilities for your Drupal site, with SiteTran!
Prerequisites:
A Drupal website that you want to translate.
A SiteTran account that you will integrate with your Drupal site. If you haven’t already, sign up for SiteTran, and add a new site.
Time needed:
Estimated time needed: 3 minutes.
Let’s get started.
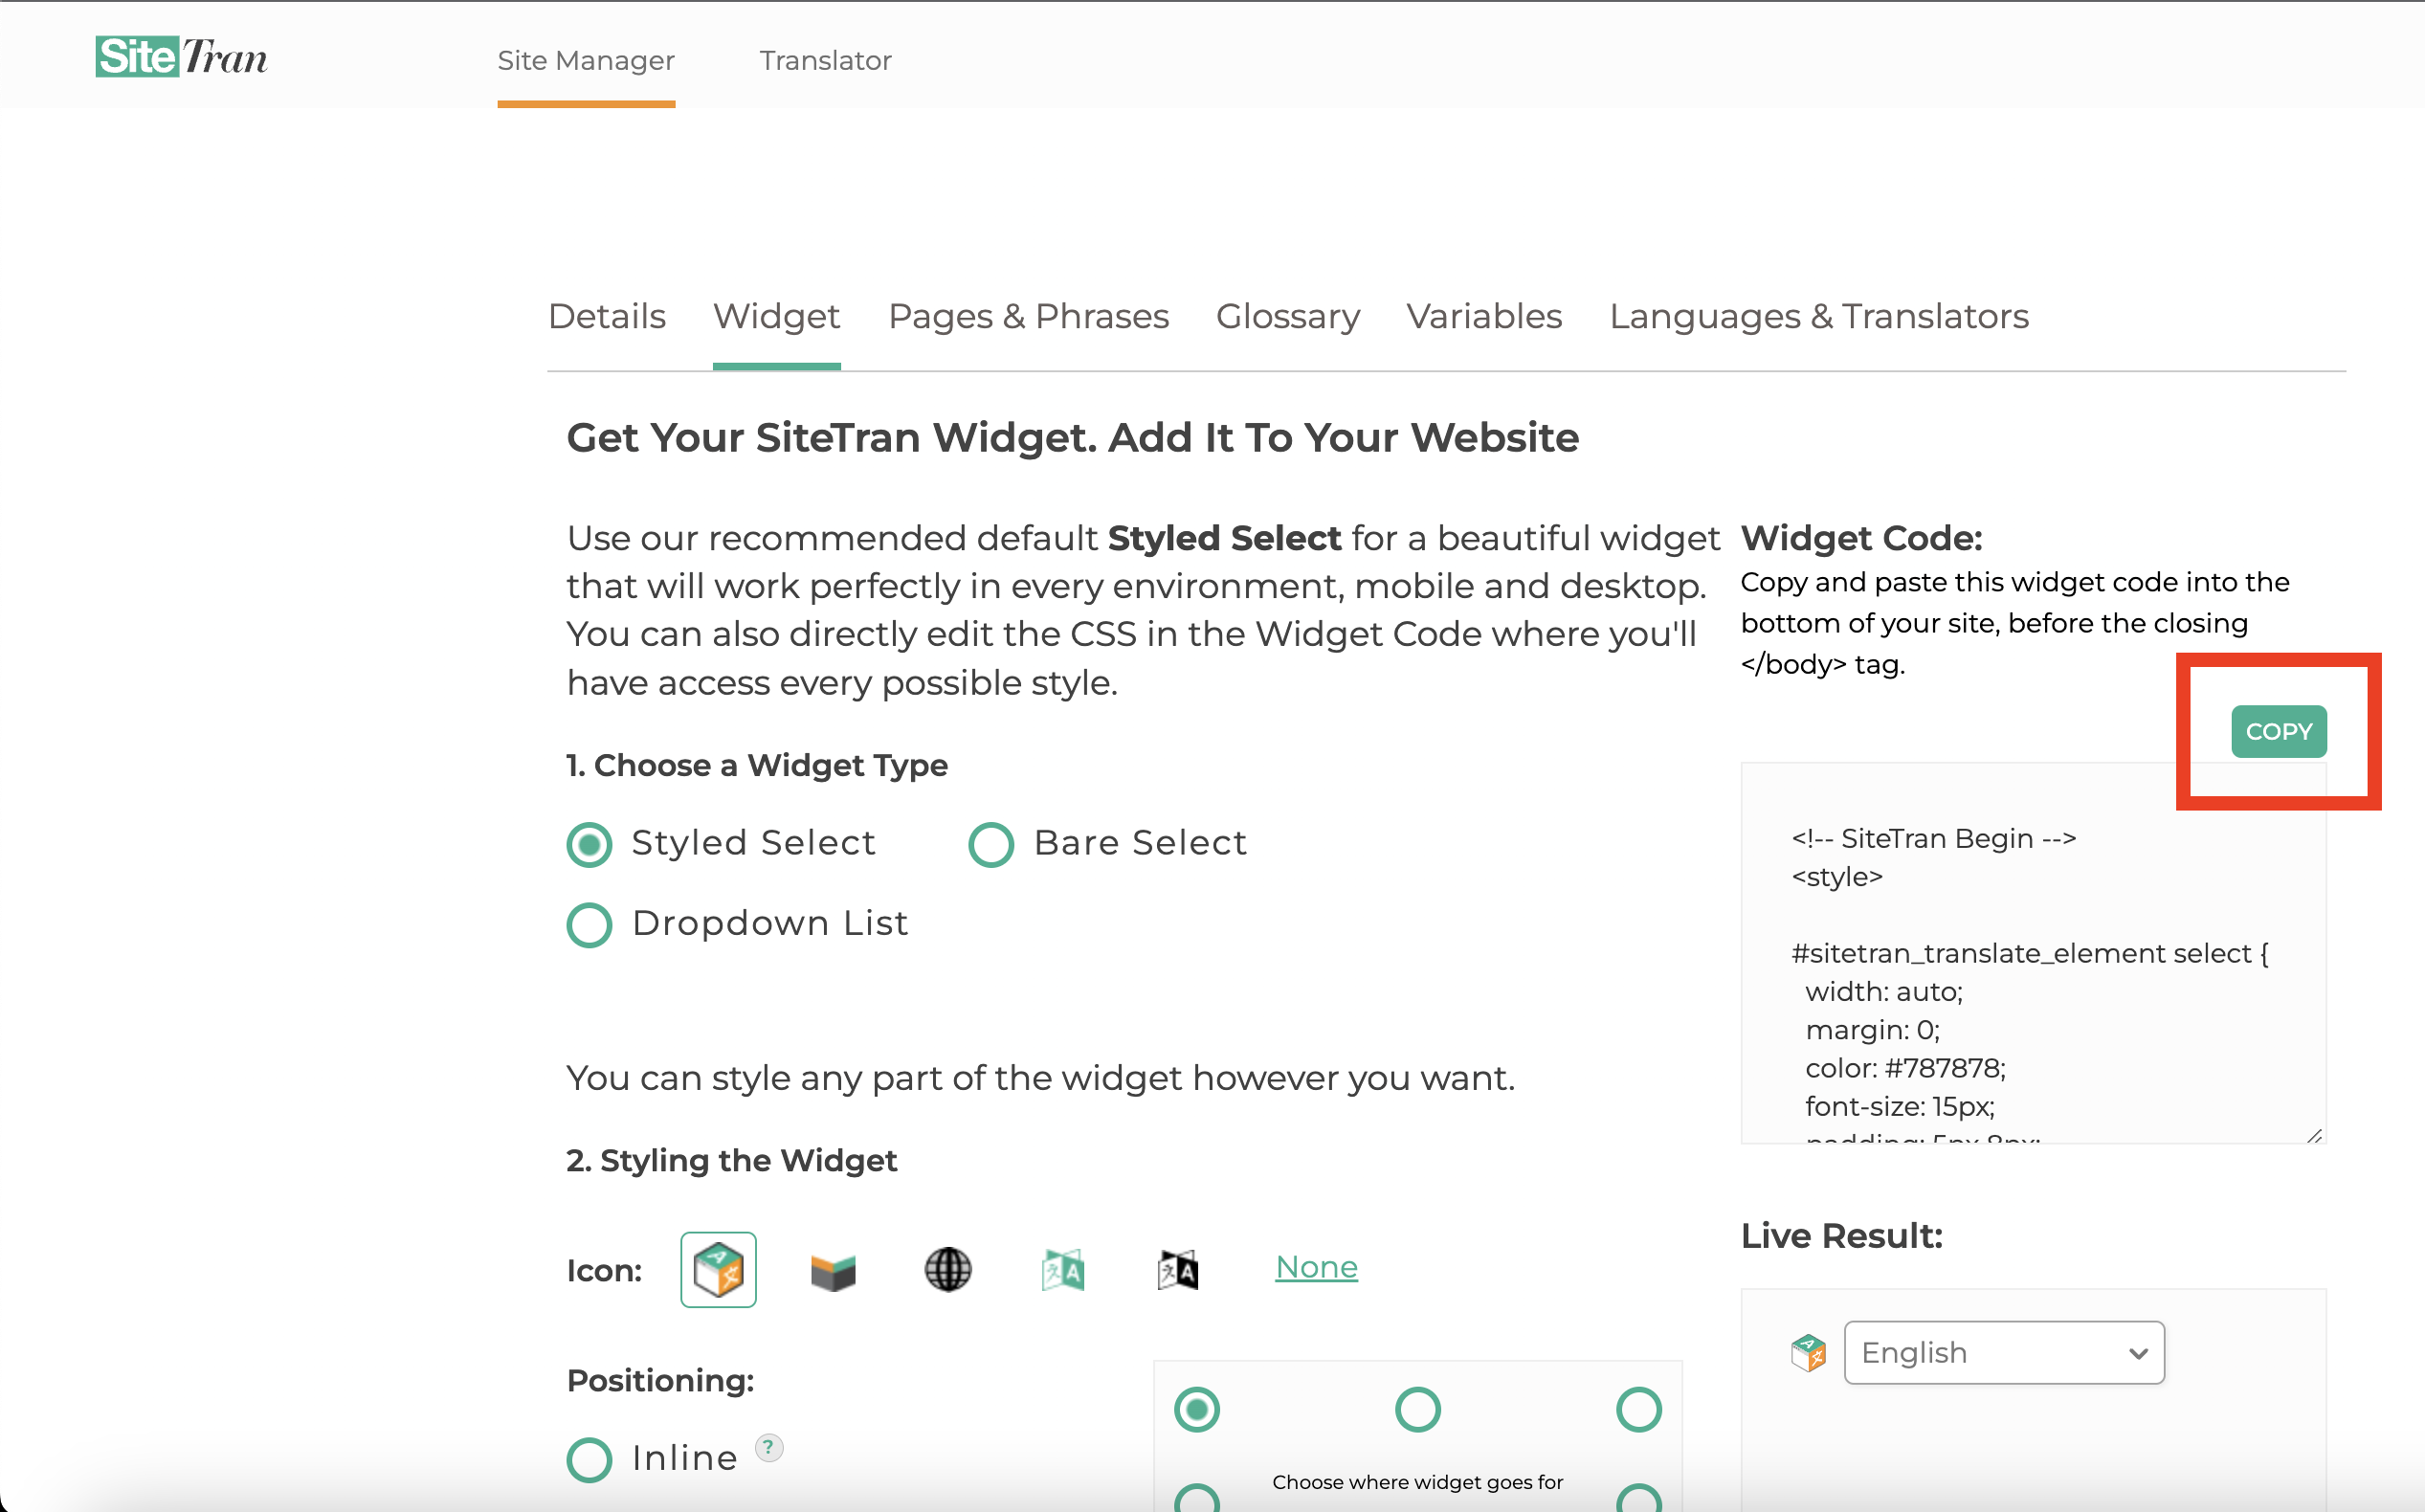
Get your Widget Code
First retrieve your widget code from SiteTran. If you haven’t already signed up for SiteTran, it only takes 30 seconds. After creating your account, create a site in SiteTran, and then proceed to get your widget code, which is what generates the language dropdown on your Shift4Shop site.
In SiteTran go to the "Widget" page.
To get your site’s SiteTran Widget Code, go to your site’s "Widget" page from the menu on top.

Copy the Widget Code
Click the "Copy" button to copy your widget code (includes your styles). You will use this in a bit.
Integrating with Drupal
Initial Login and Navigation
In a new tab, log in to your Drupal website
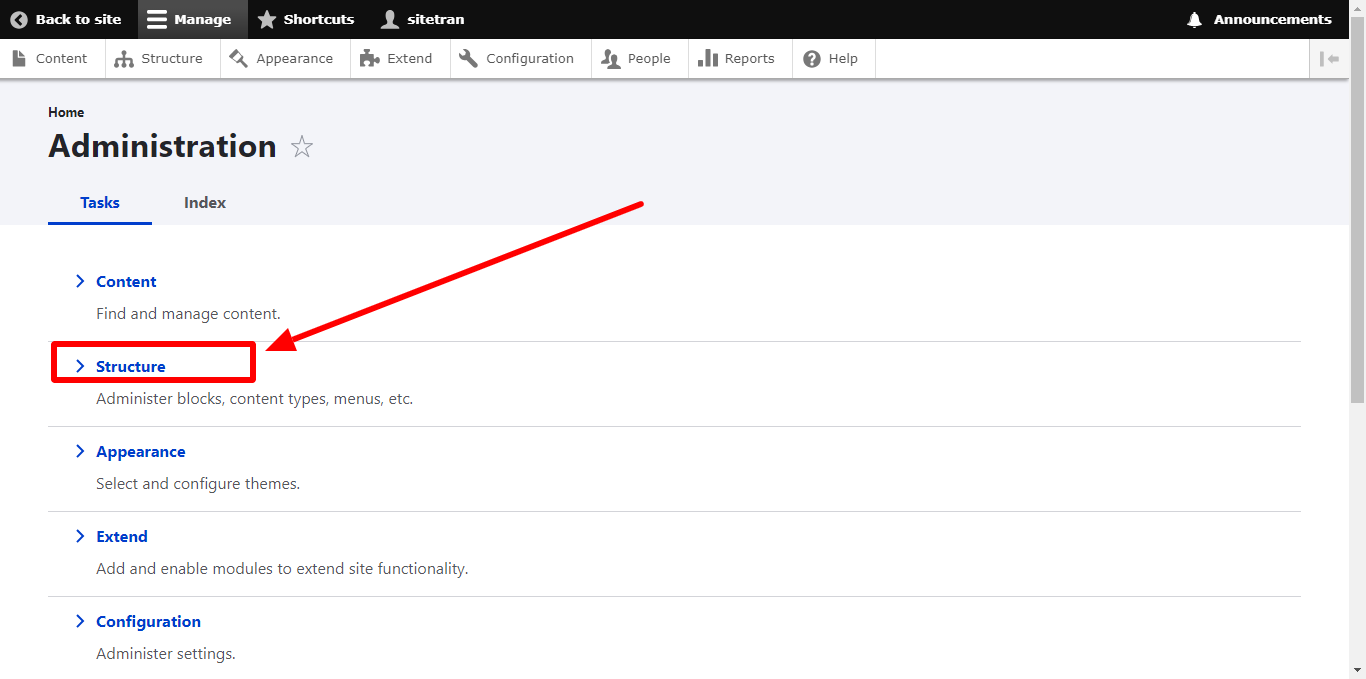
Access Drupal Admin Dashboard
In the admin dashboard, locate and click on "Structure".
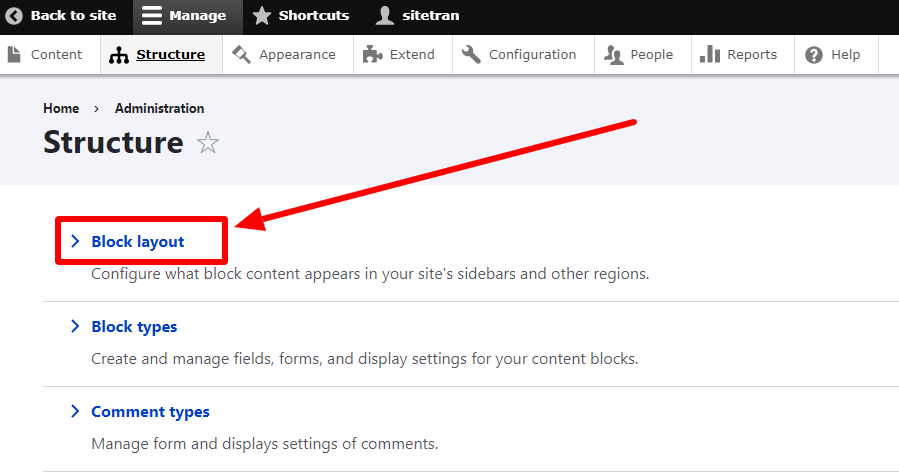
Navigate to Block Layout
Within the Structure page, find and click on "Block layout".
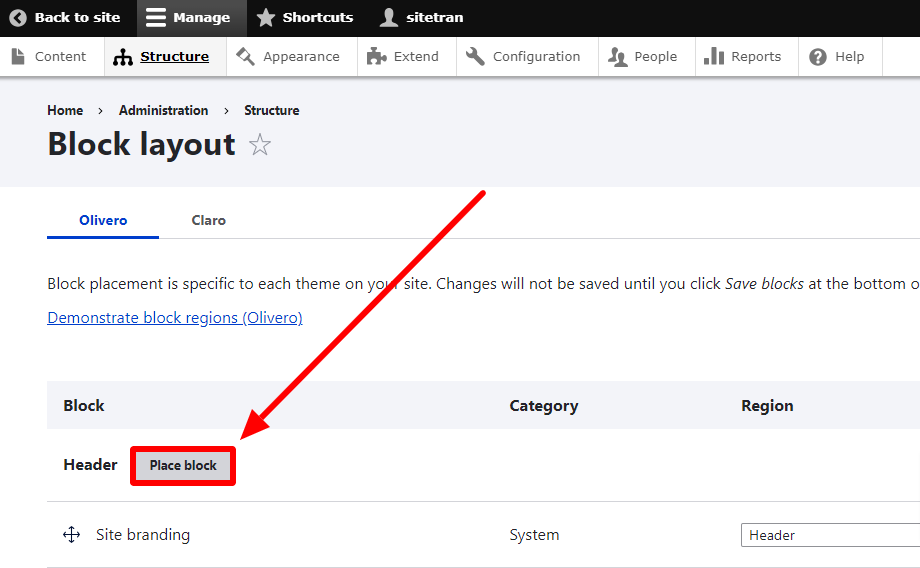
Add New Block
On the Block Layout page, locate the "header" section.
Beside the "header," click on "Place block."
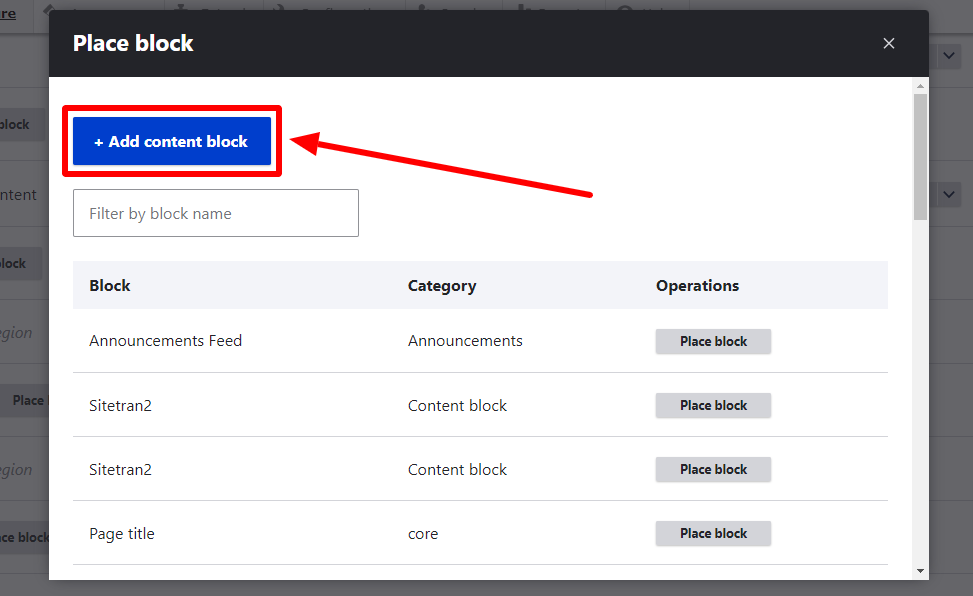
Add Content Block
A popup window will appear. Click on "+ Add Content Block."
Edit Content Block
On the Content Block editor page:
- Fill in the "Block Description" field with your desired description.
- In the "Body" field, paste your HTML SiteTran Code.
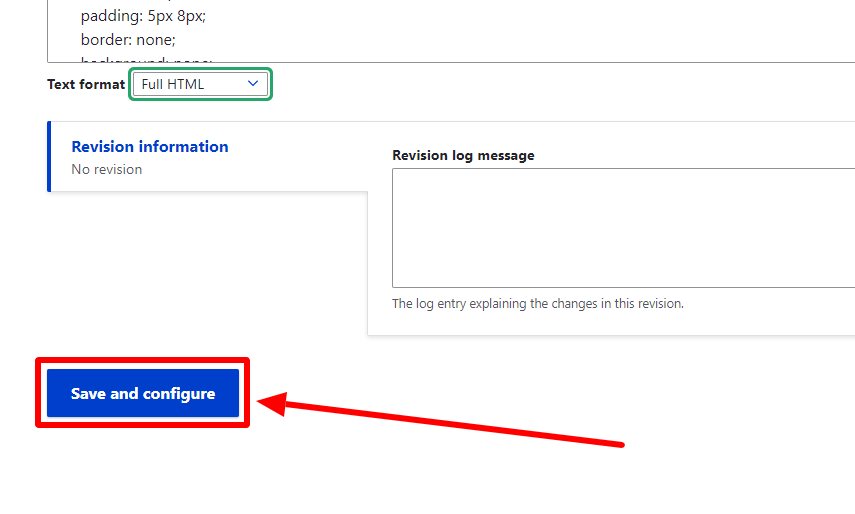
- Click the "Text Format" dropdown to reveal options.
- Select "Full HTML".

Save and Configure
After configuring the content block, click "Save and Configure" at the bottom left of the page.
Configure Block Settings
On the "Configure block" page:
- Click the dropdown labeled "Region" to reveal options.
- Select "Header" from the dropdown.
- Click the "Save block" button to save the changes.

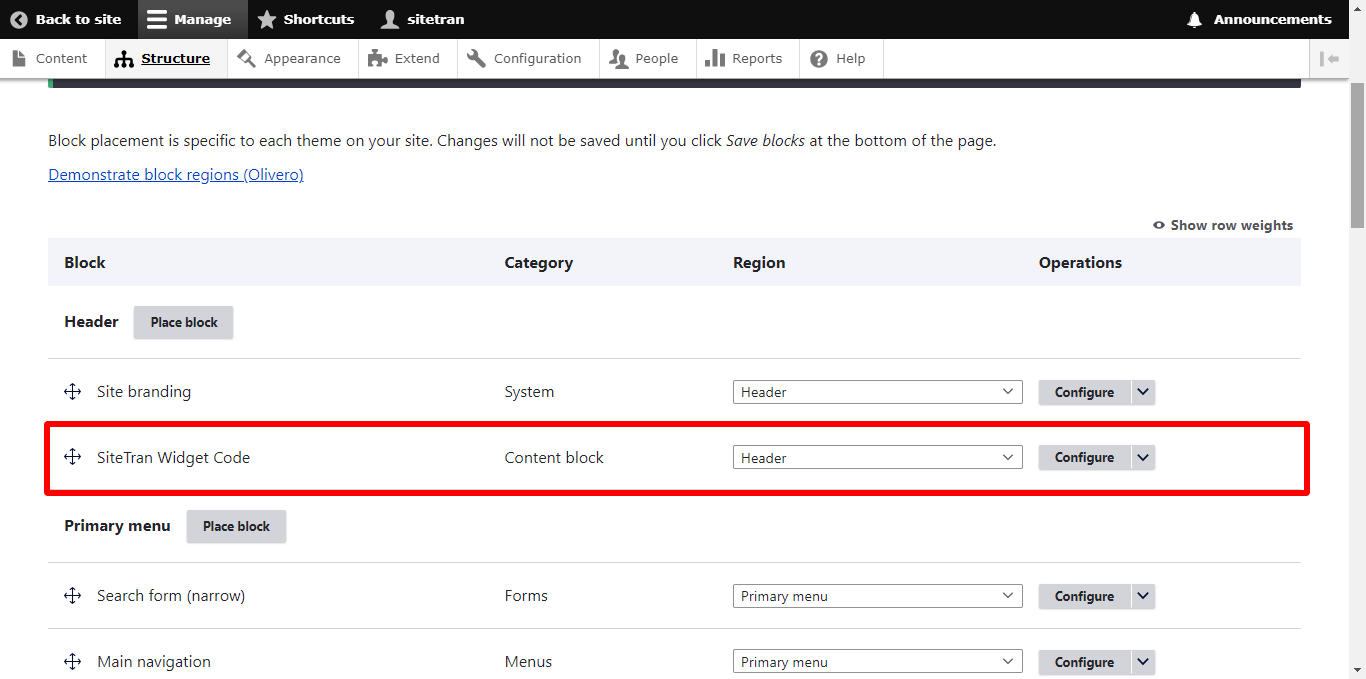
Verify Block Placement
On the next page you should see the content block you just created under the "Header" section.
Verifying & Translating
Testing the Integration.
Visit your Drupal site, and locate the SiteTran Widget. Choose your new language from the dropdown, and SiteTran will begin discovering your phrases.
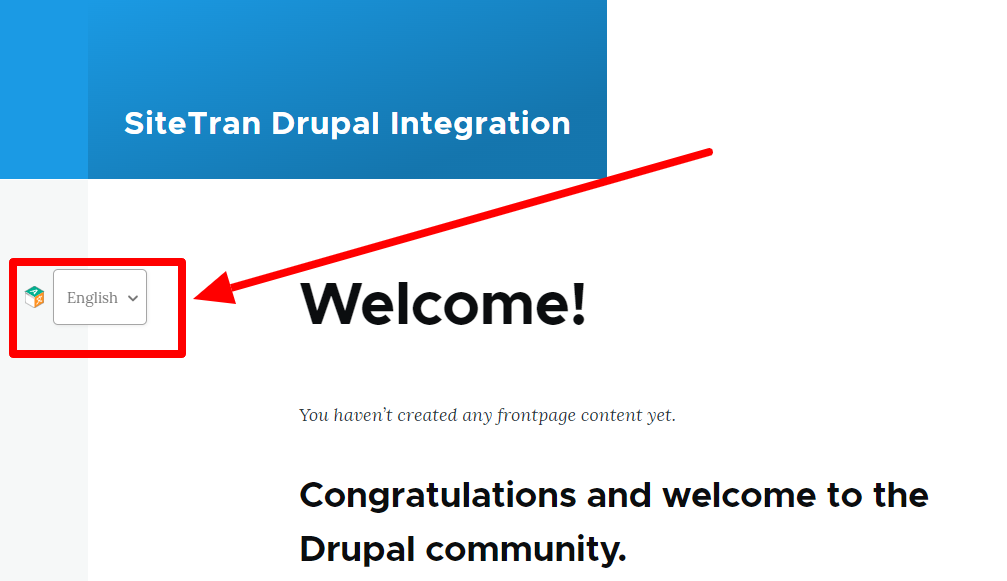
Congratulations! You have successfully integrated SiteTran with your Drupal store.
Guide to Translating
Translating is easy. Read our quick guide on translating for newcomers.


