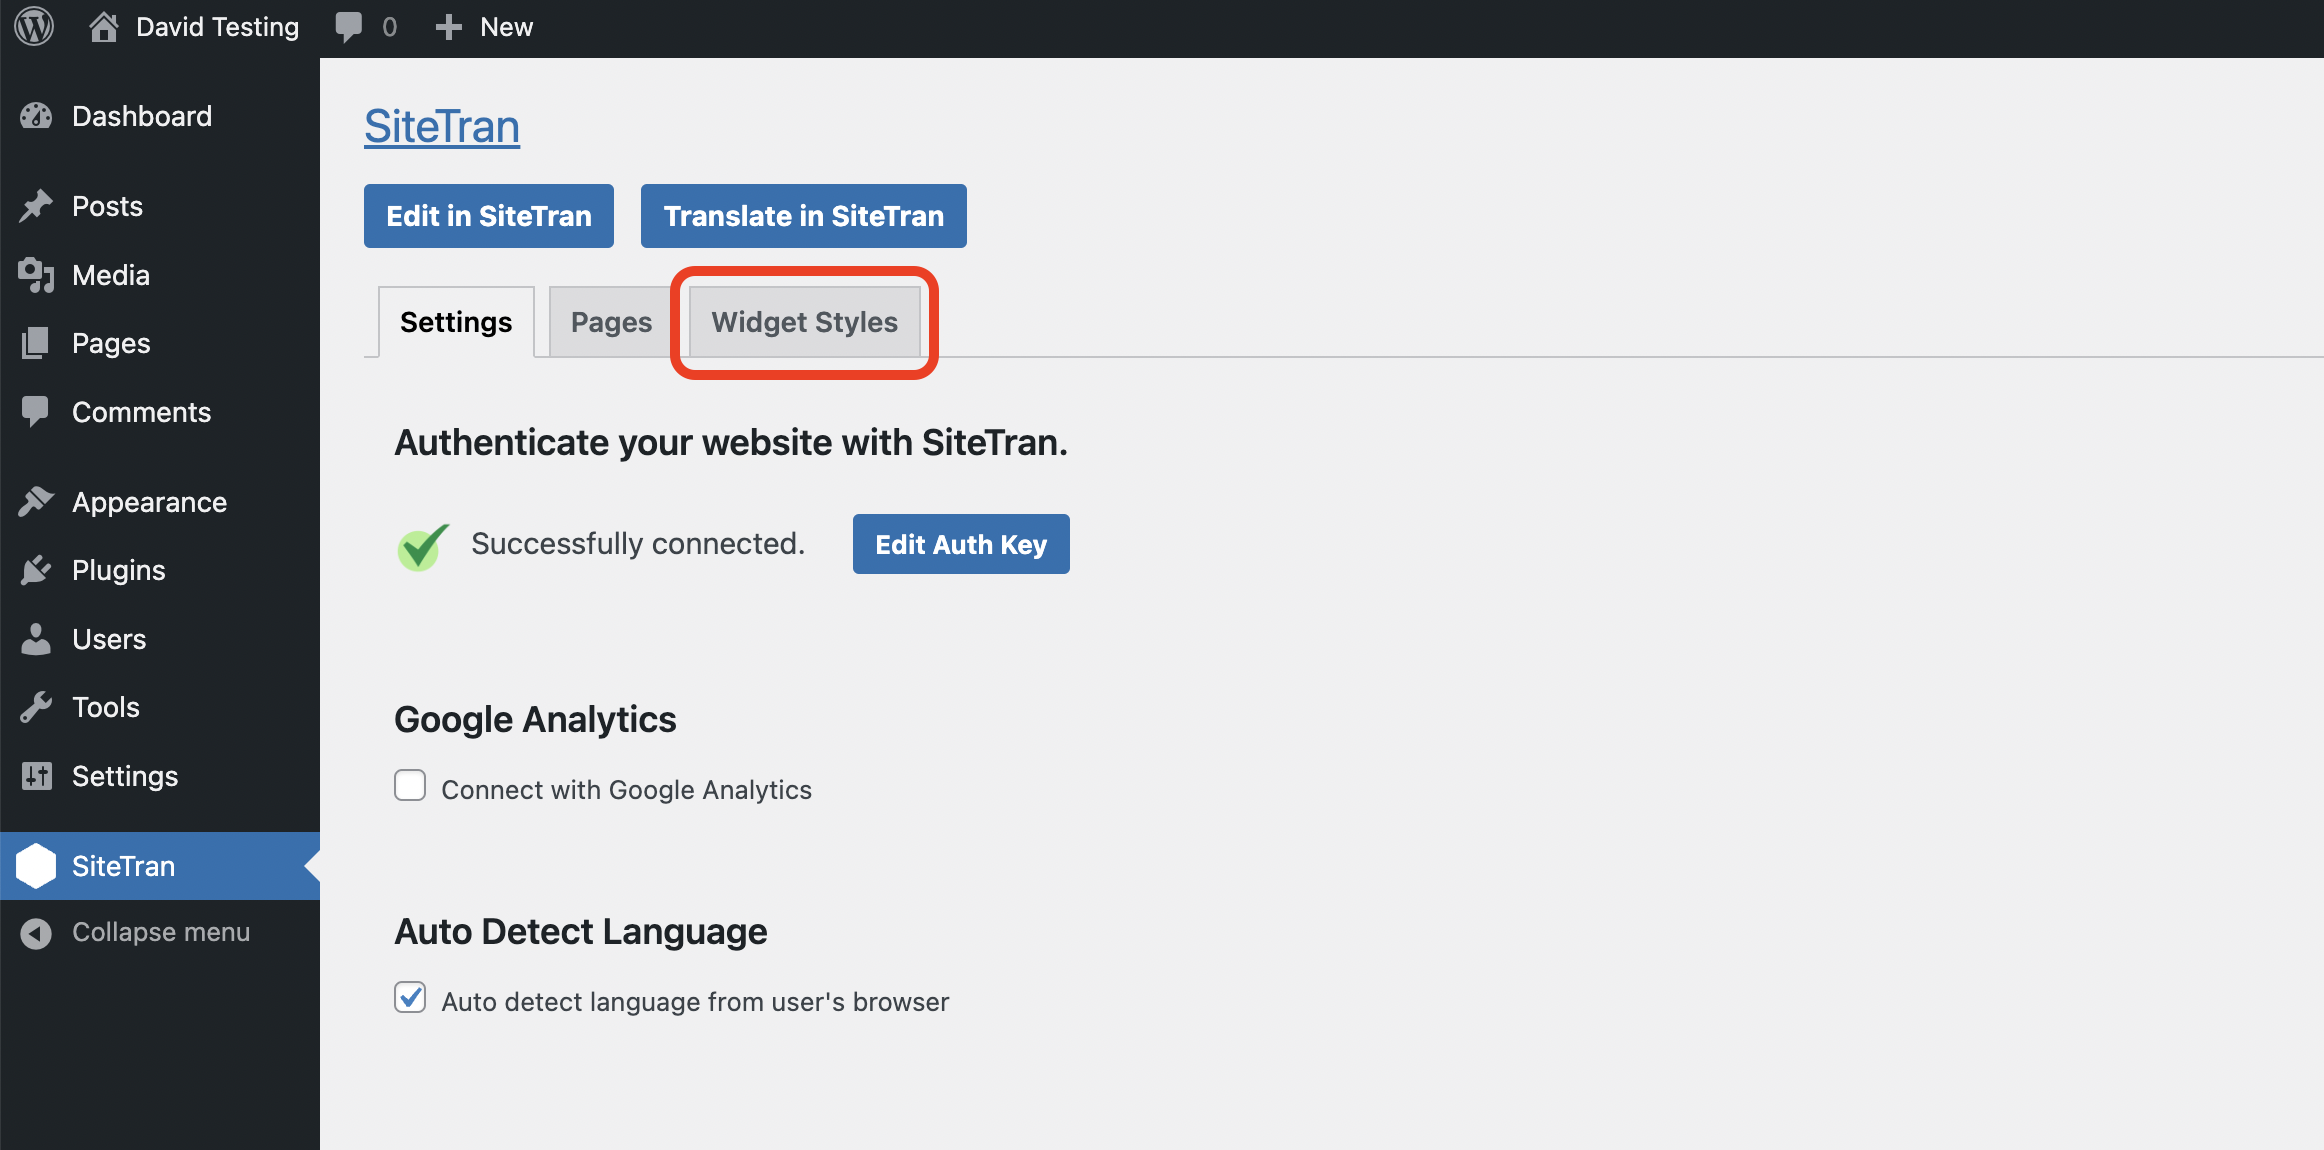
You can edit your widget styles from the SiteTran plugin page inside your WordPress admin site, or from your Site Manager interface inside SiteTran. Let's start with what you can do in your WordPress admin site.
Styling in WordPress
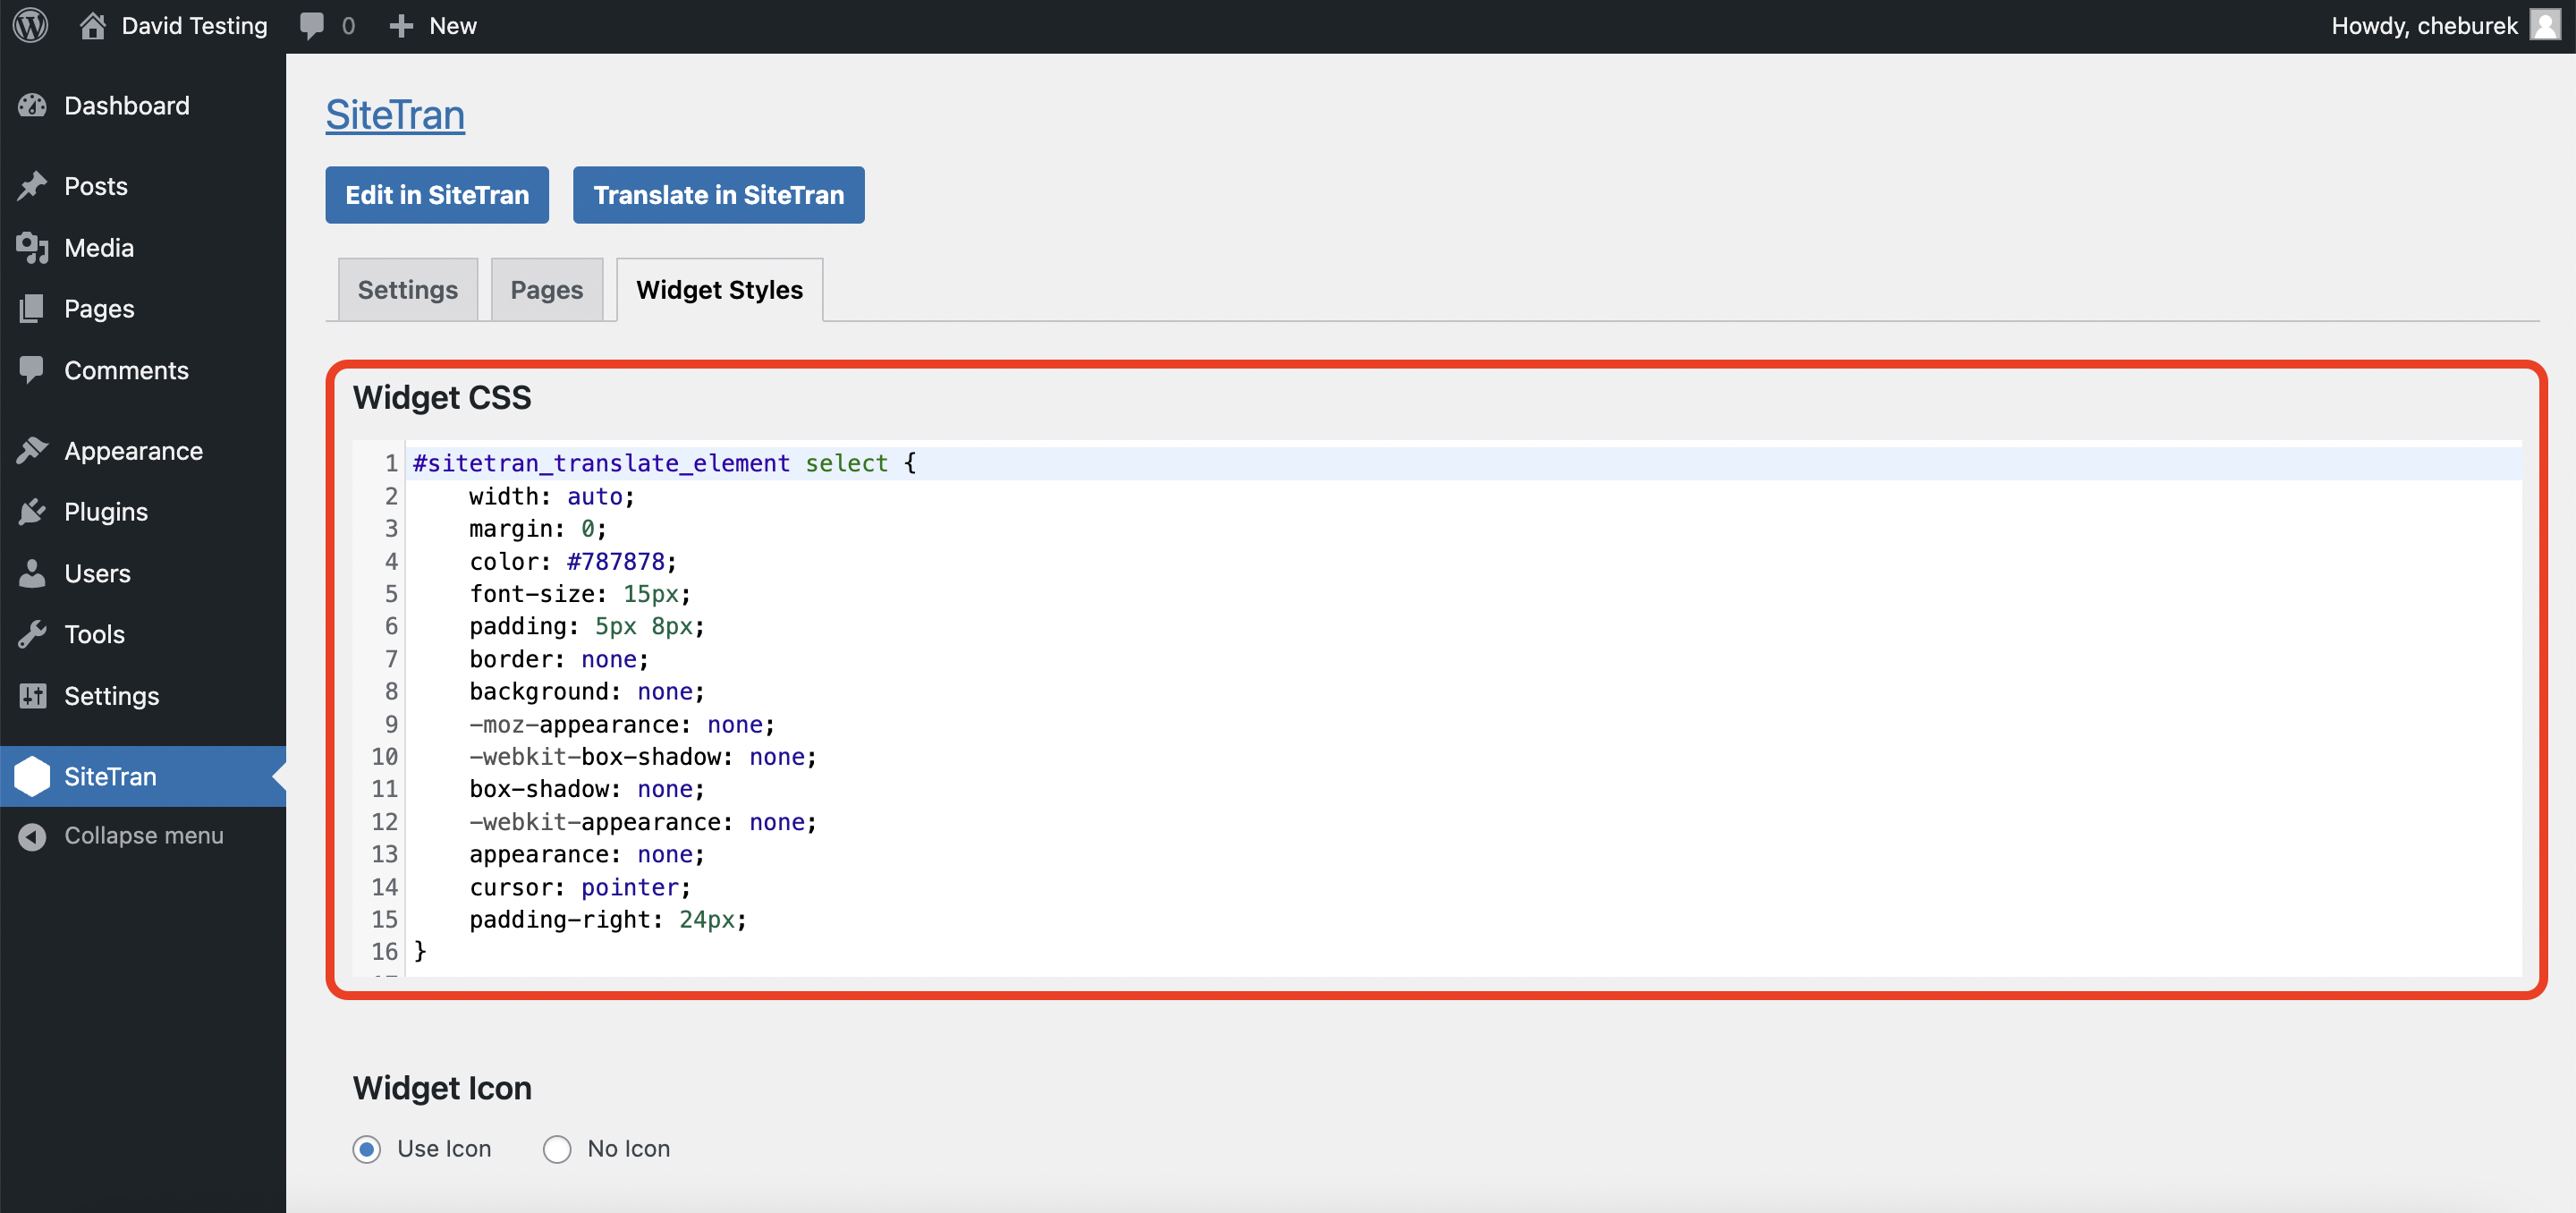
1) Navigate to the "Widget Styles" page
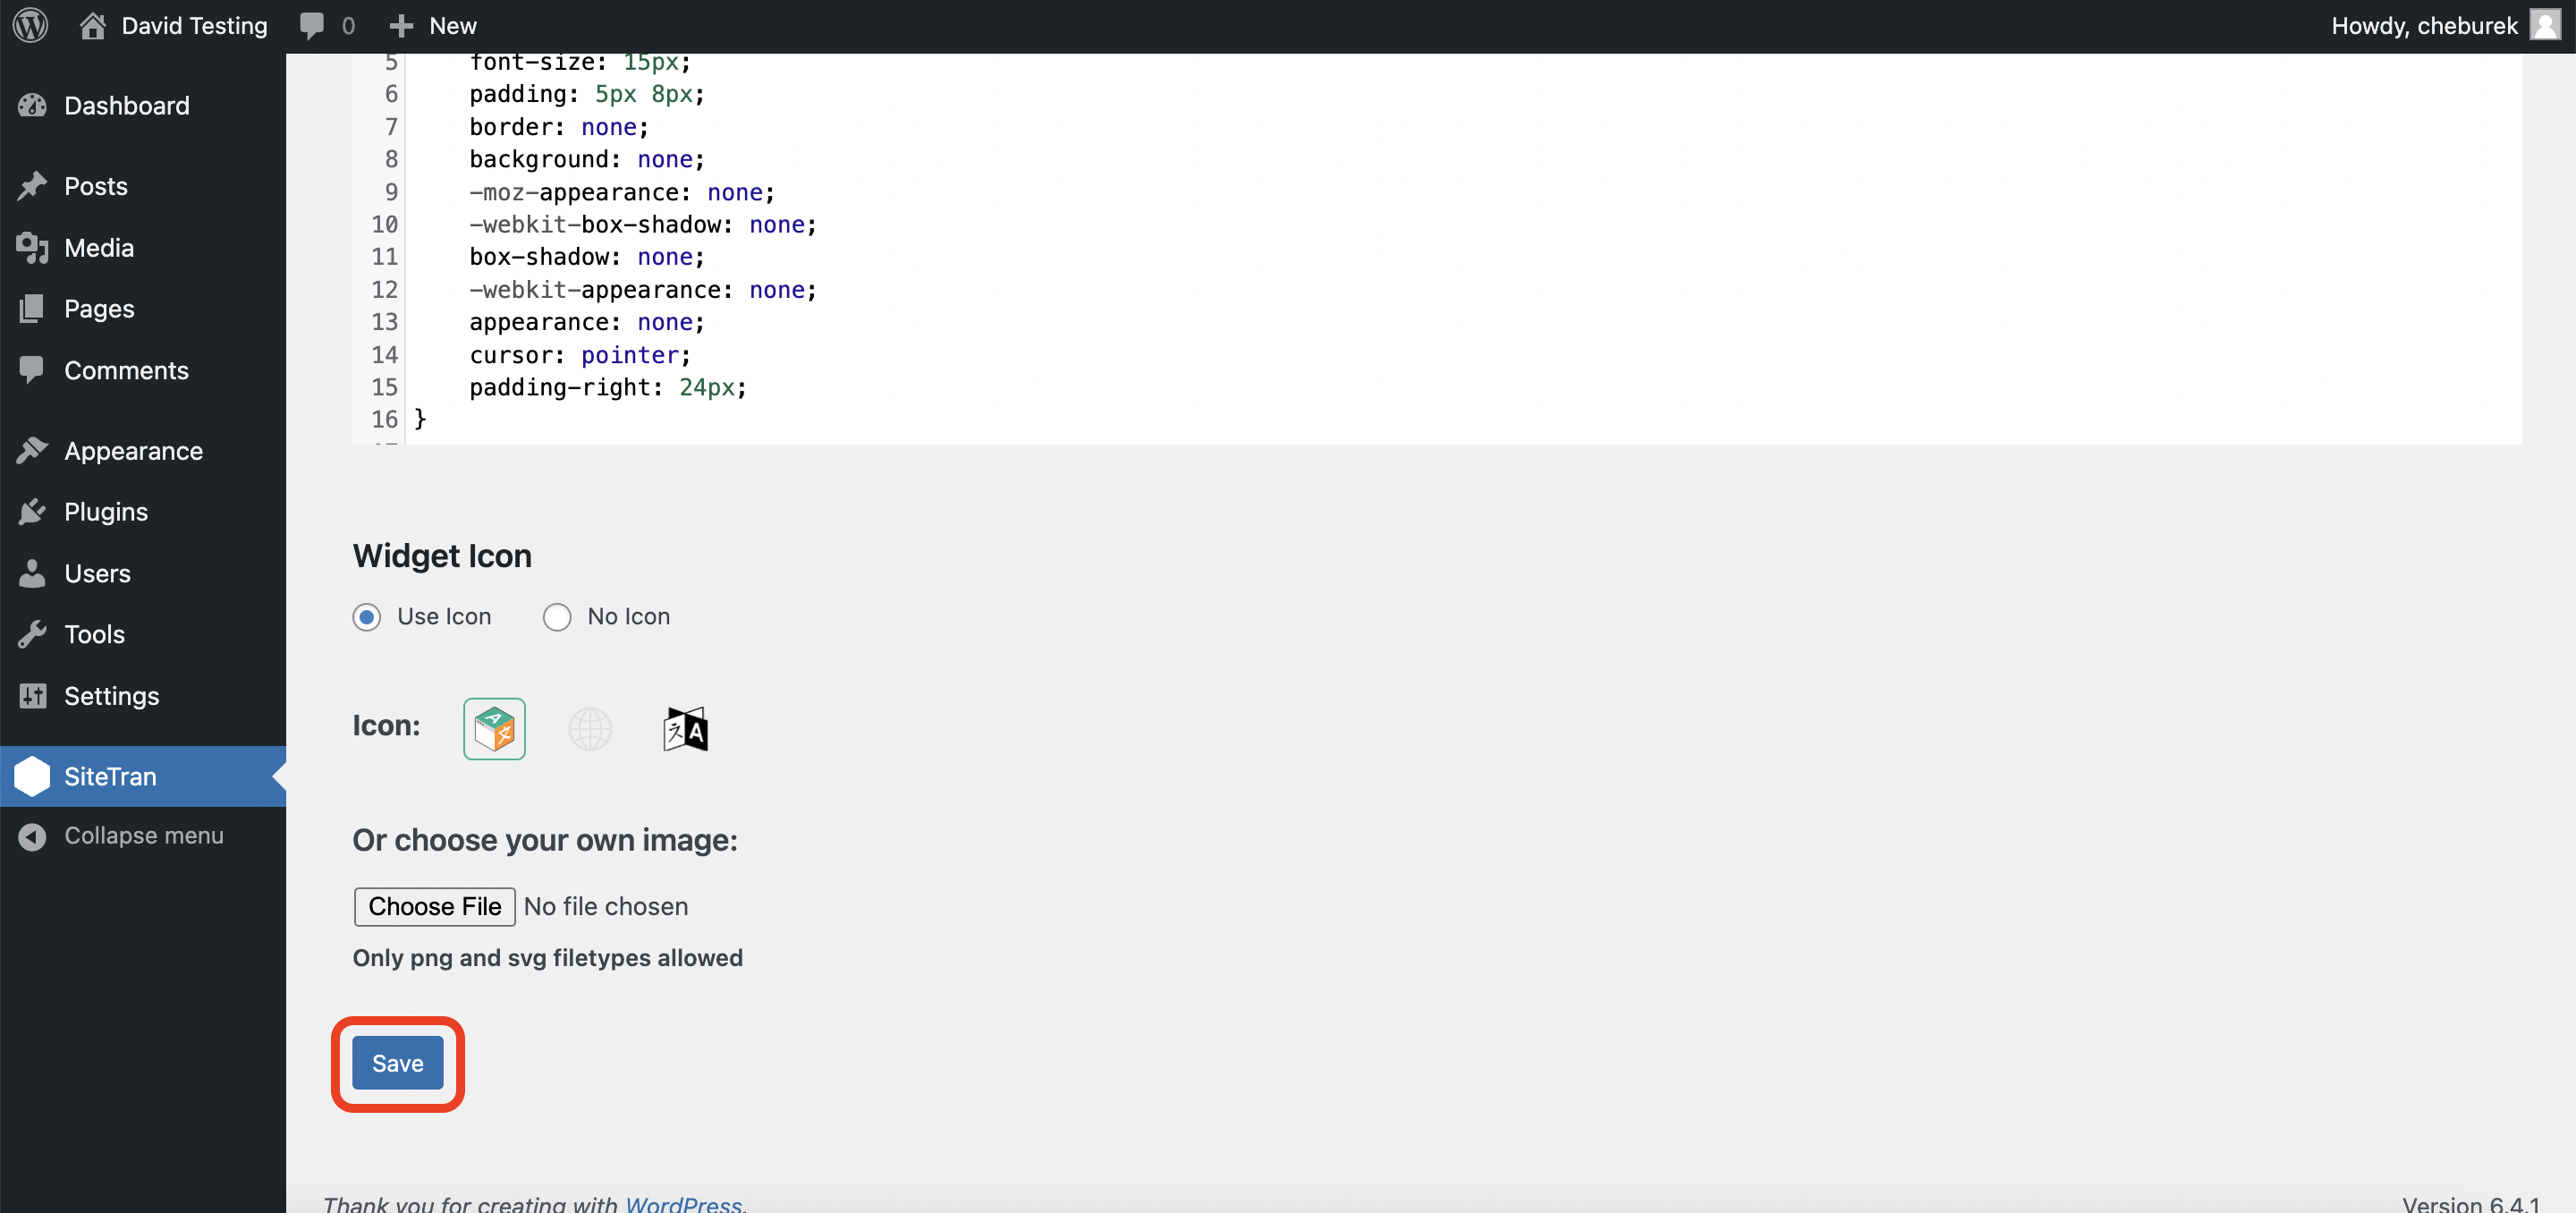
2) Choose icon type
Scroll down to the "Widget Icon" section and select the icon that you want to appear next to the language dropdown on your site. You can also choose to not display an icon at all.
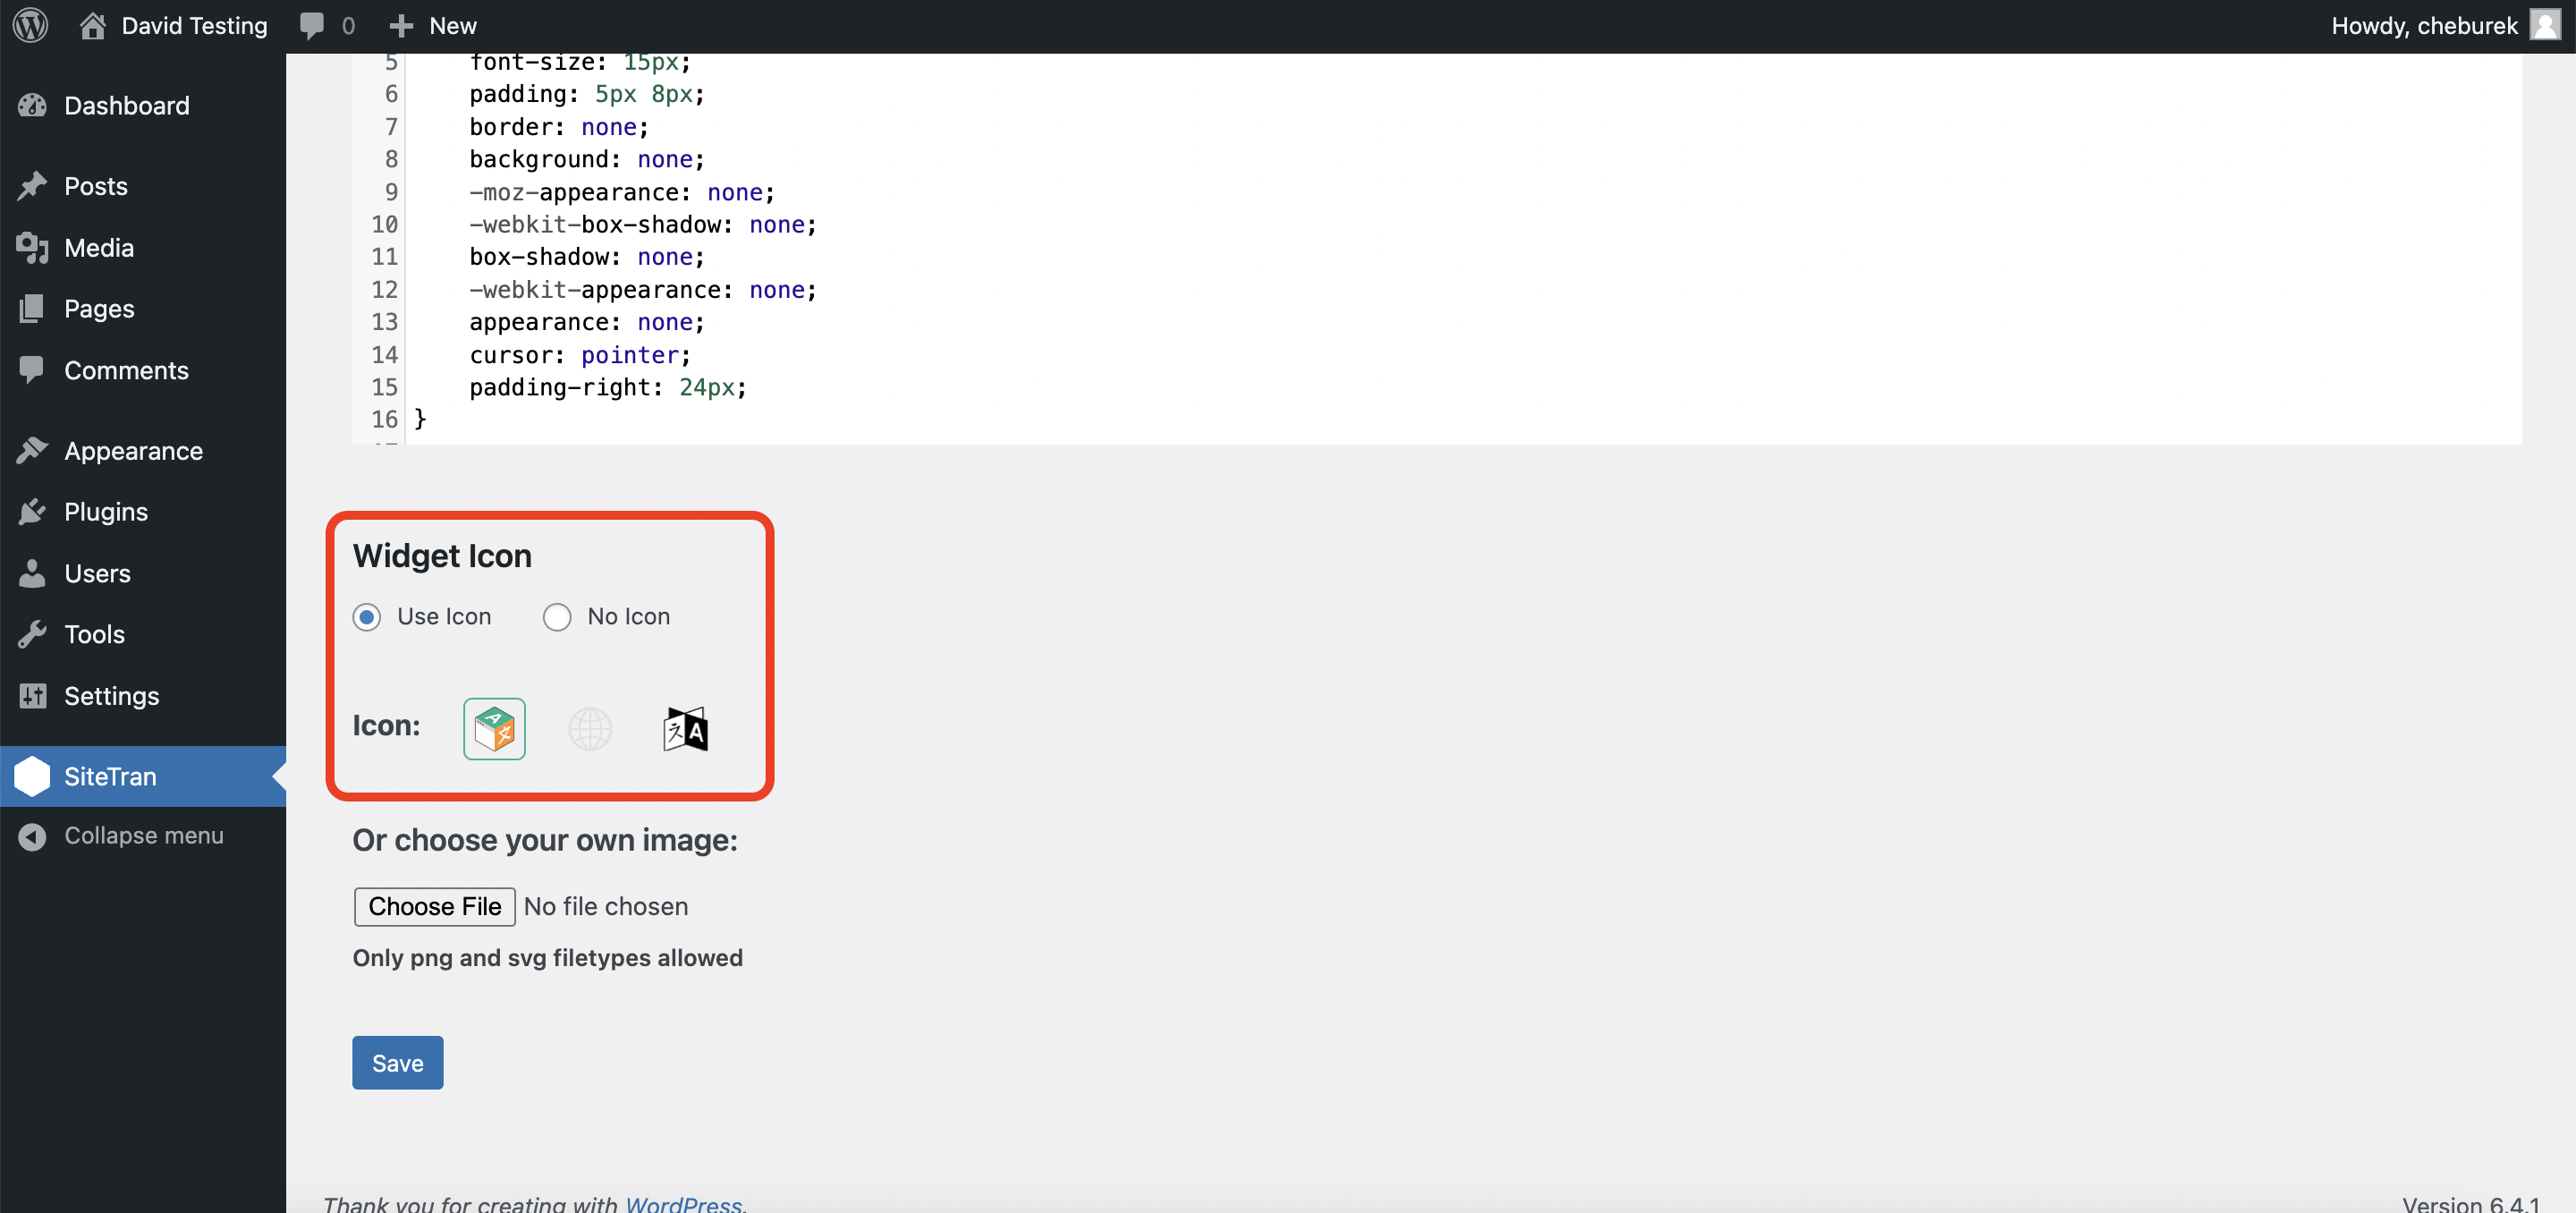
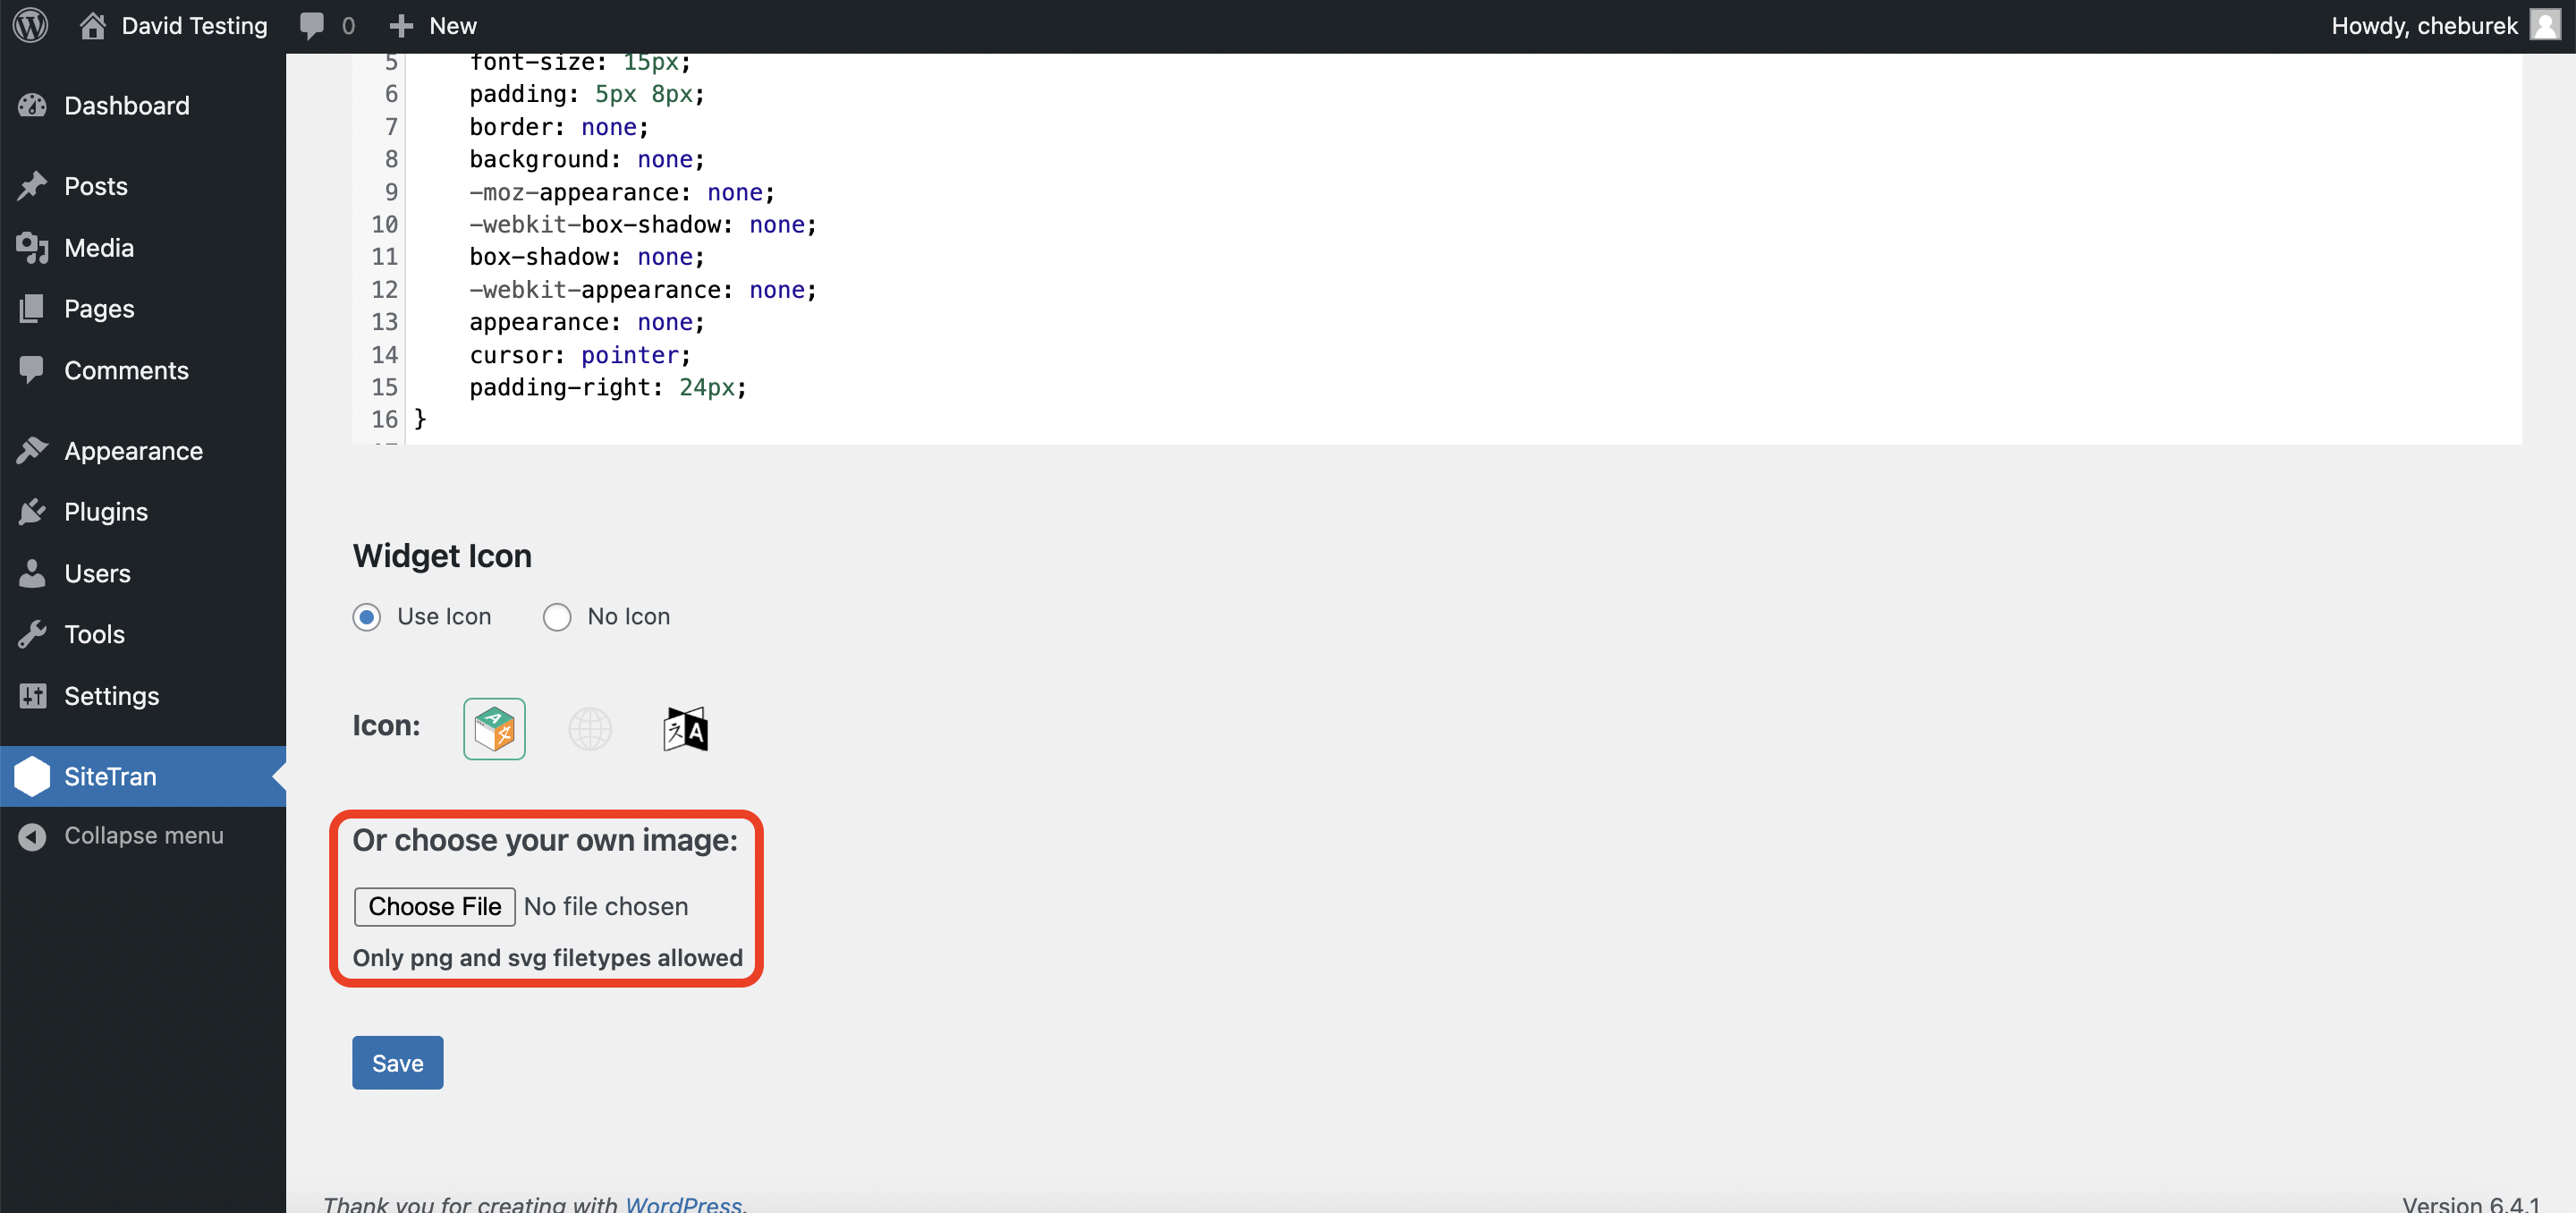
3) Upload your own icon
If you prefer to use your own icon for the language dropdown, feel free to upload it. Supported formats are PNG and SVG.
4) Edit the widget CSS
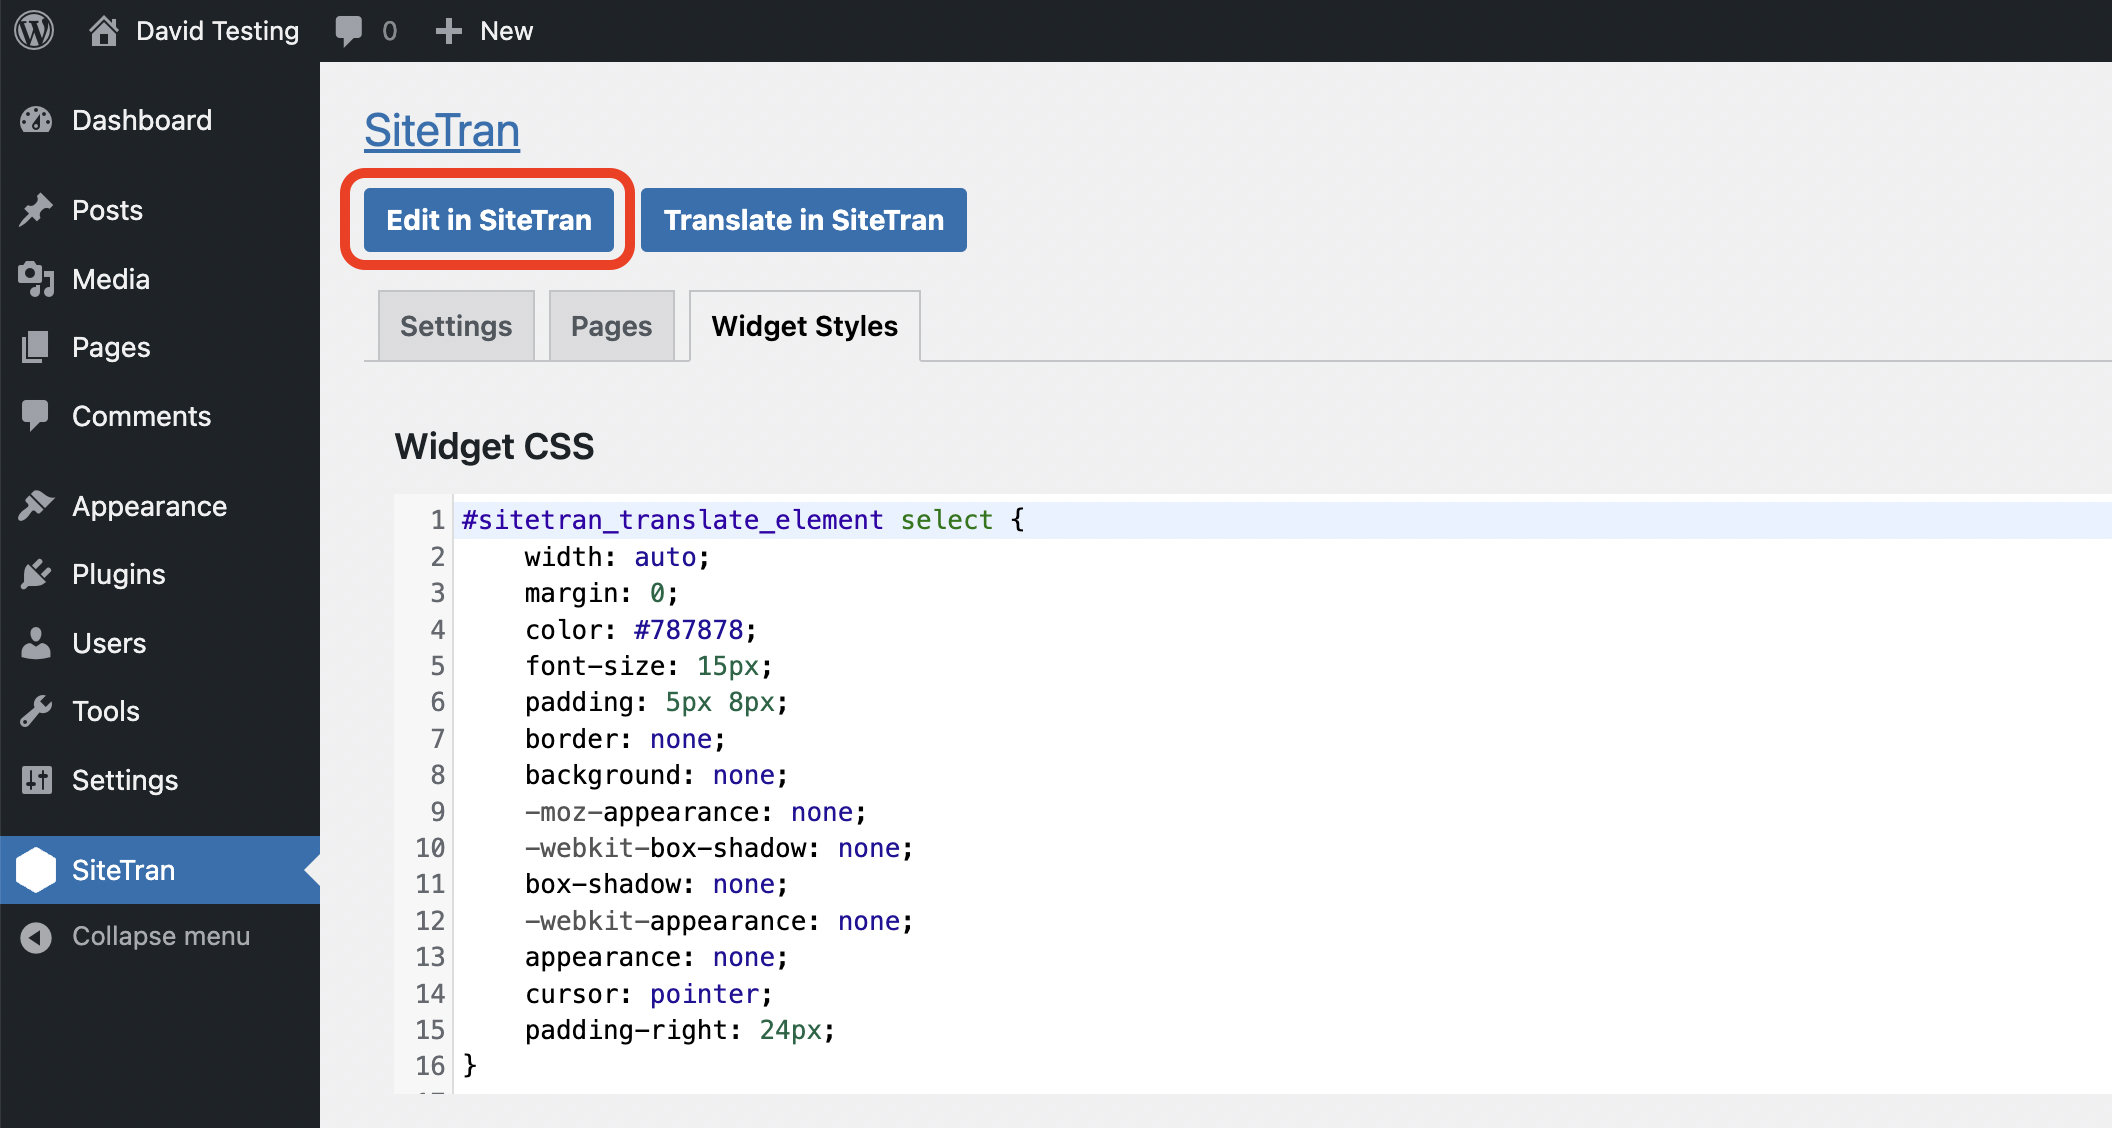
If you'd like to edit the widget CSS directly, scroll back up to the top of the page to the "Widget CSS" section.
5) Save your changes
Don't forget to save your changes!
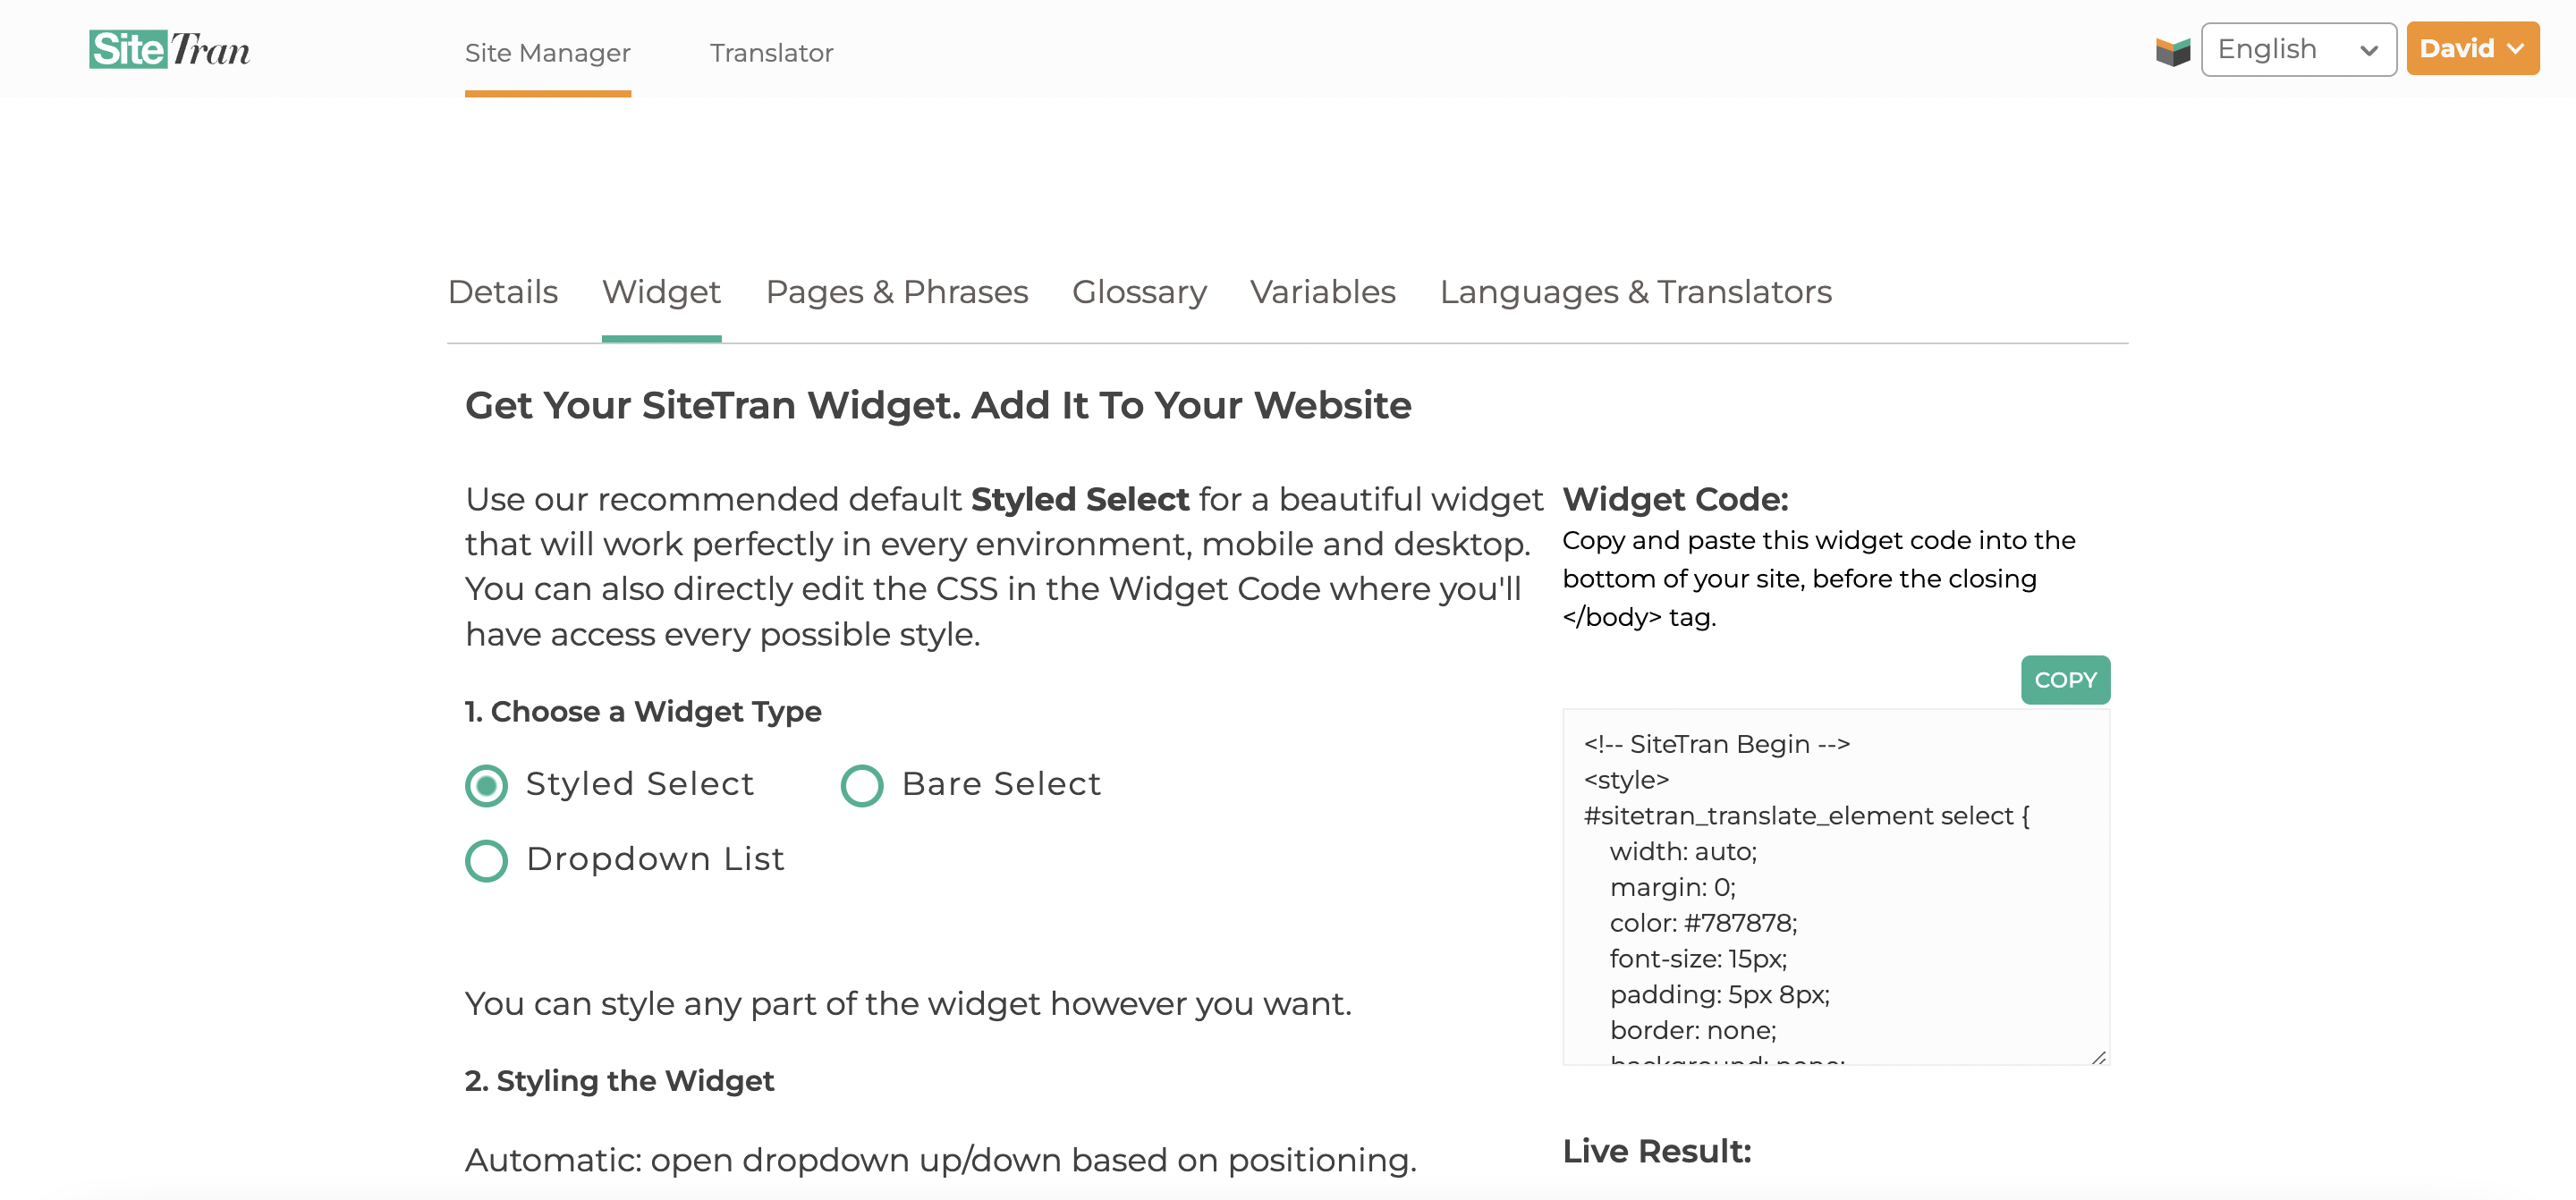
Styling in SiteTran
You can also edit your widget styles inside the Site Manager interface inside SiteTran. Let's take a look at how to do that.
1) Go to your Site Manager interface
2) Go to the "Widget" page
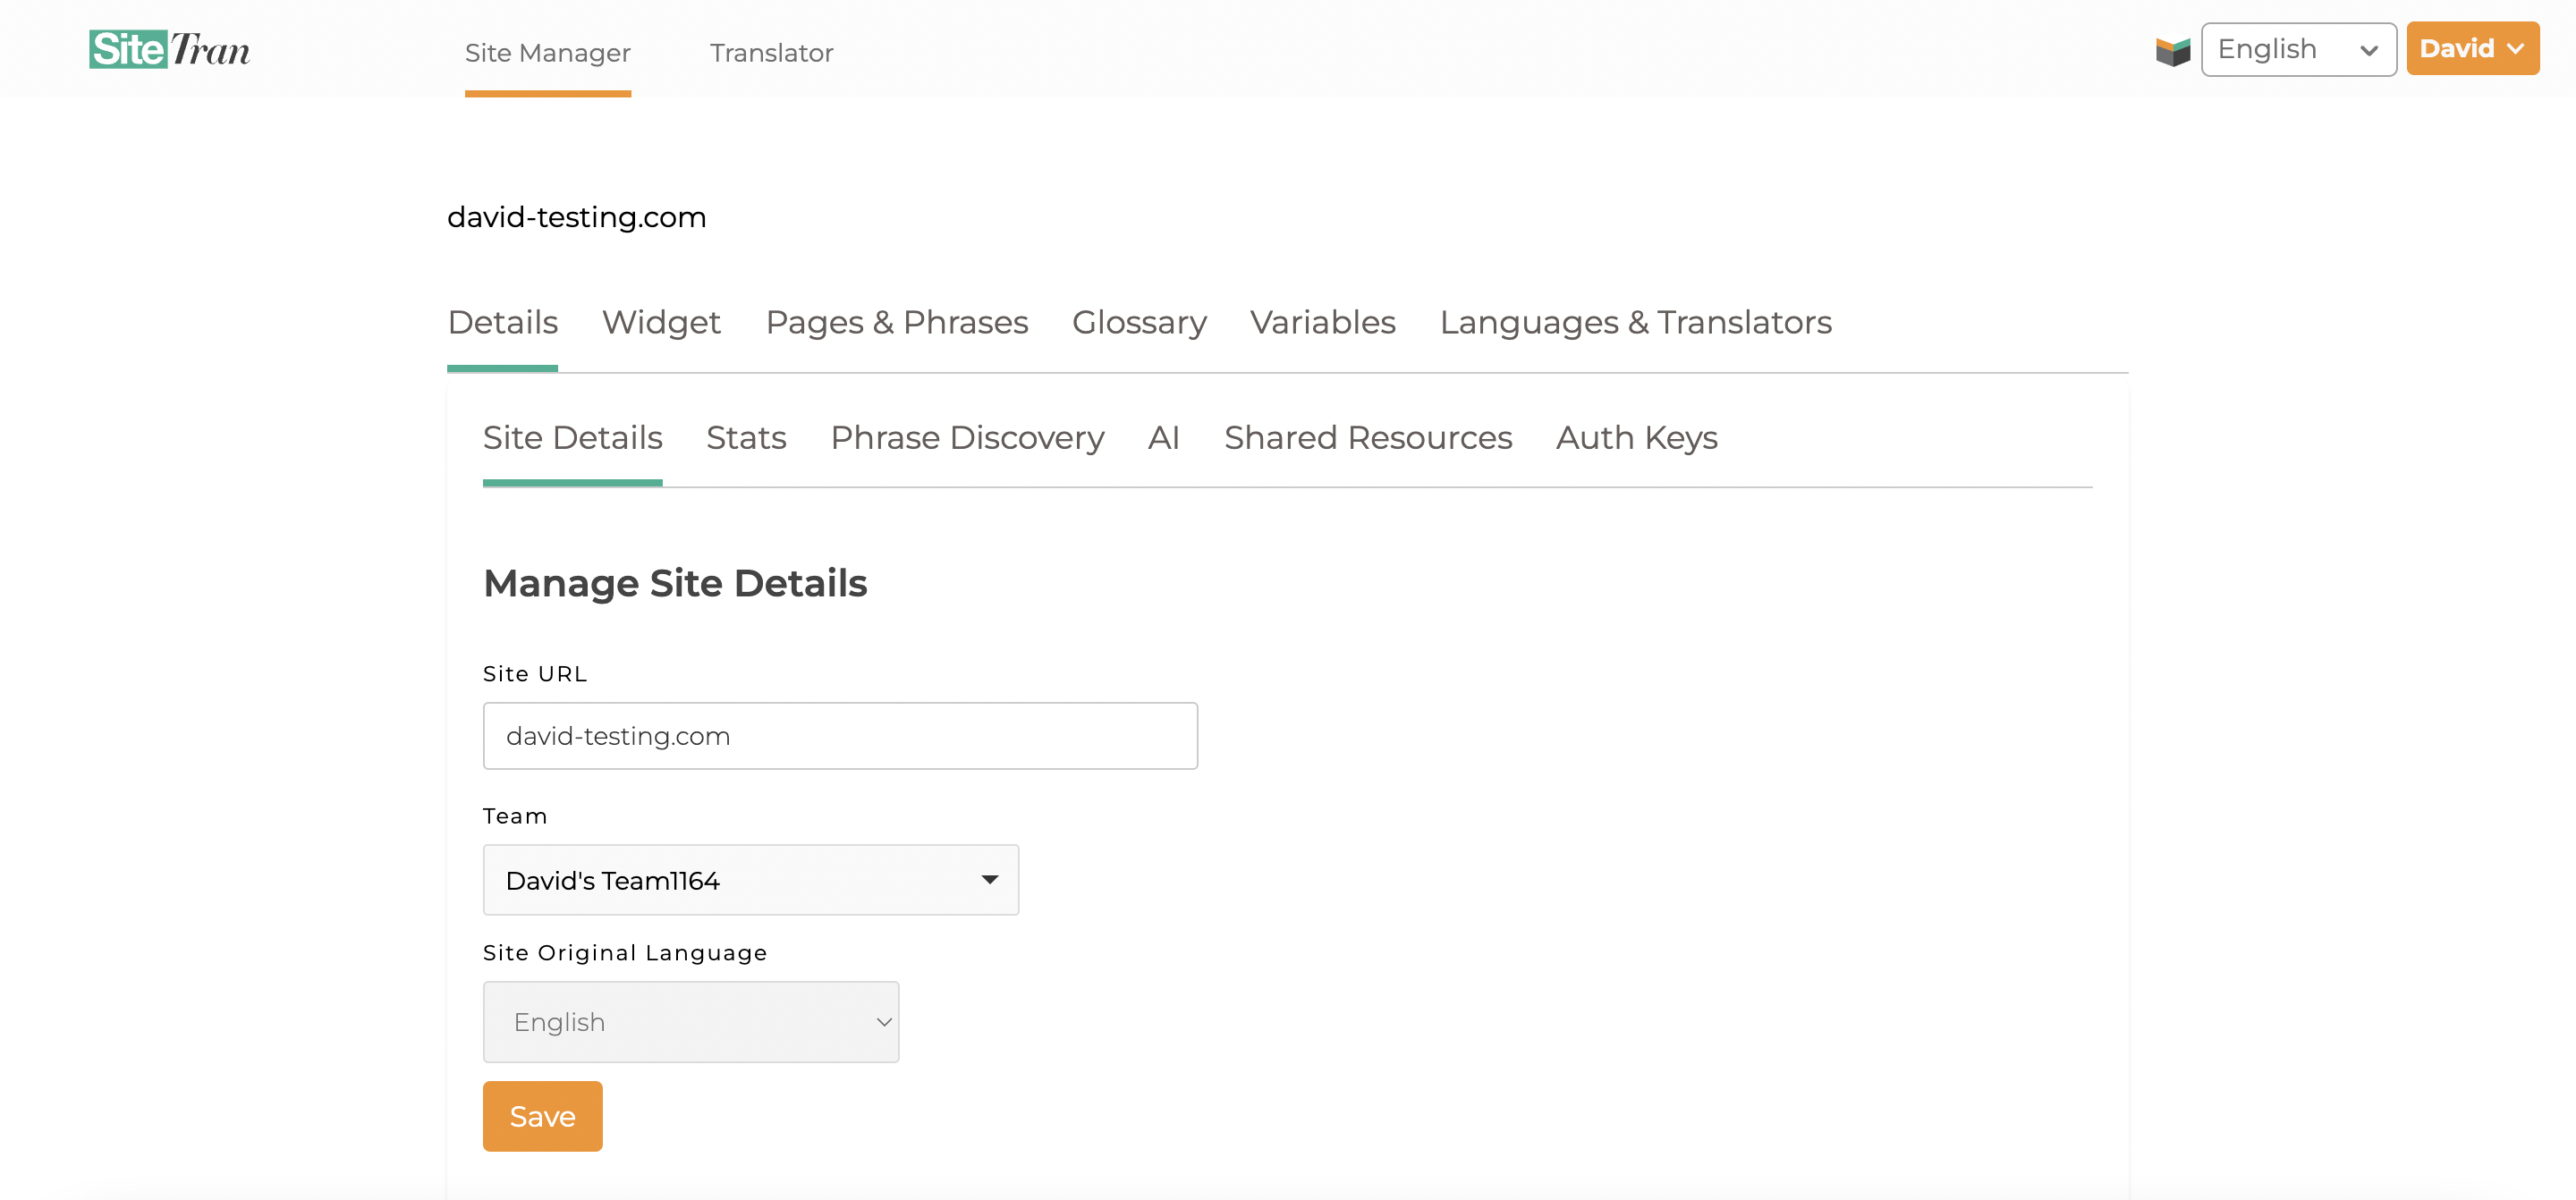
Once inside the Site Manager interface, click on "Widget" to go to the widget styles page.
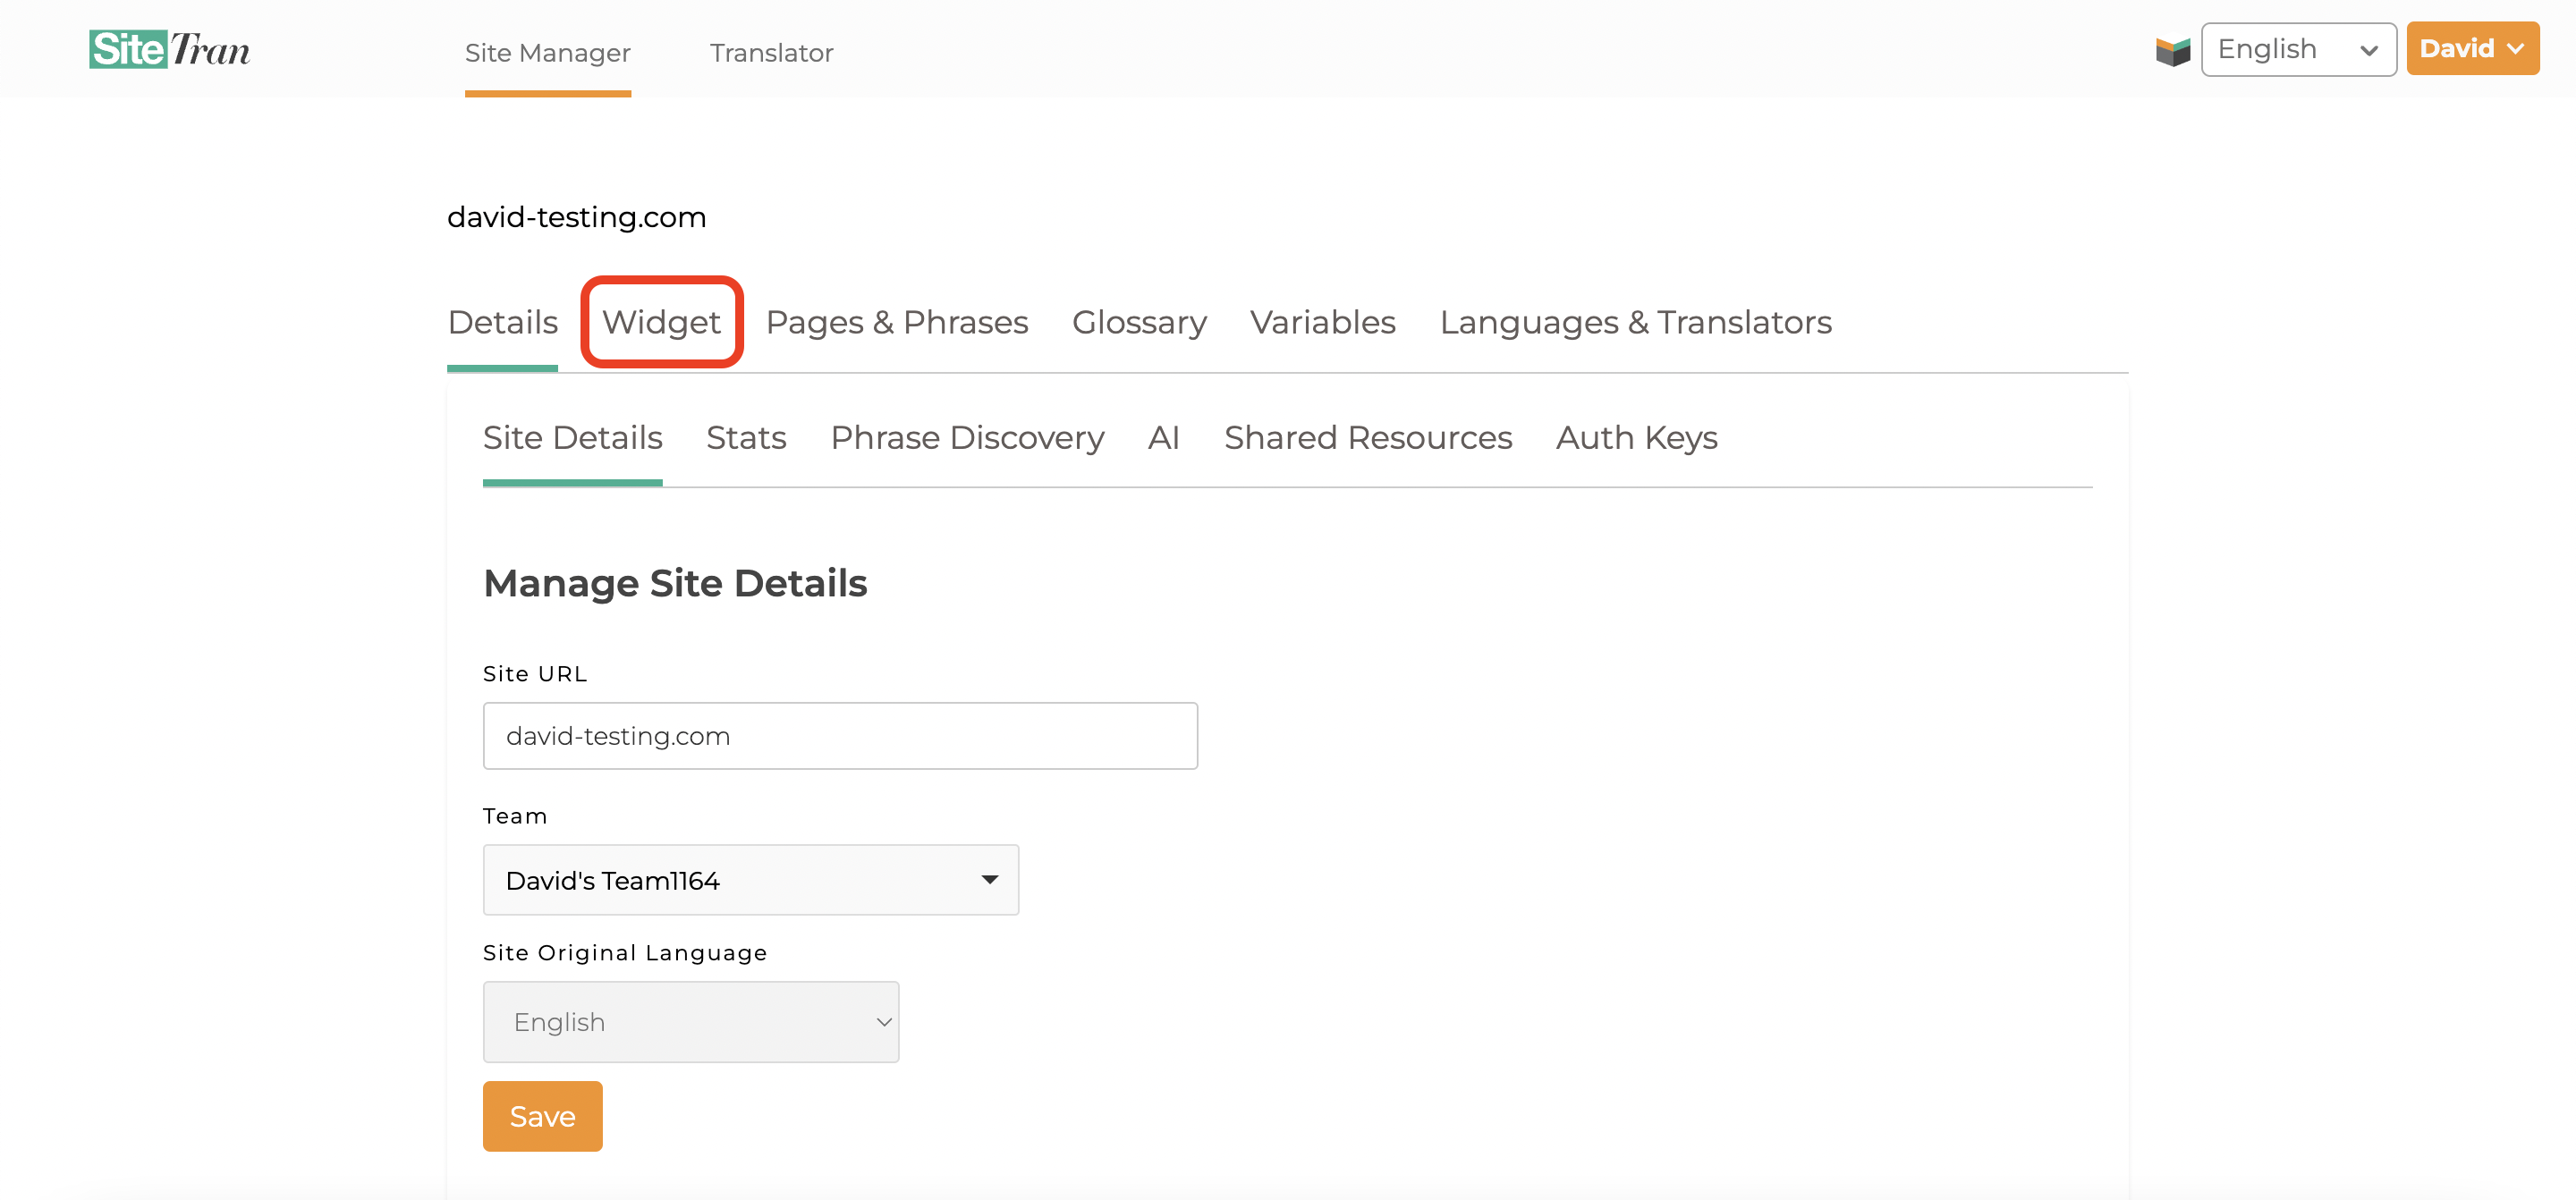
Once inside the Site Manager interface, click on "Widget" to go to the widget styles page.