
Enabling Search Engine Optimization (SEO) for the languages that your website is translated to is essential for ensuring that the translated versions of your website get the same amount of traffic as your original site. Follow the steps below to enable SEO for your WordPress site.
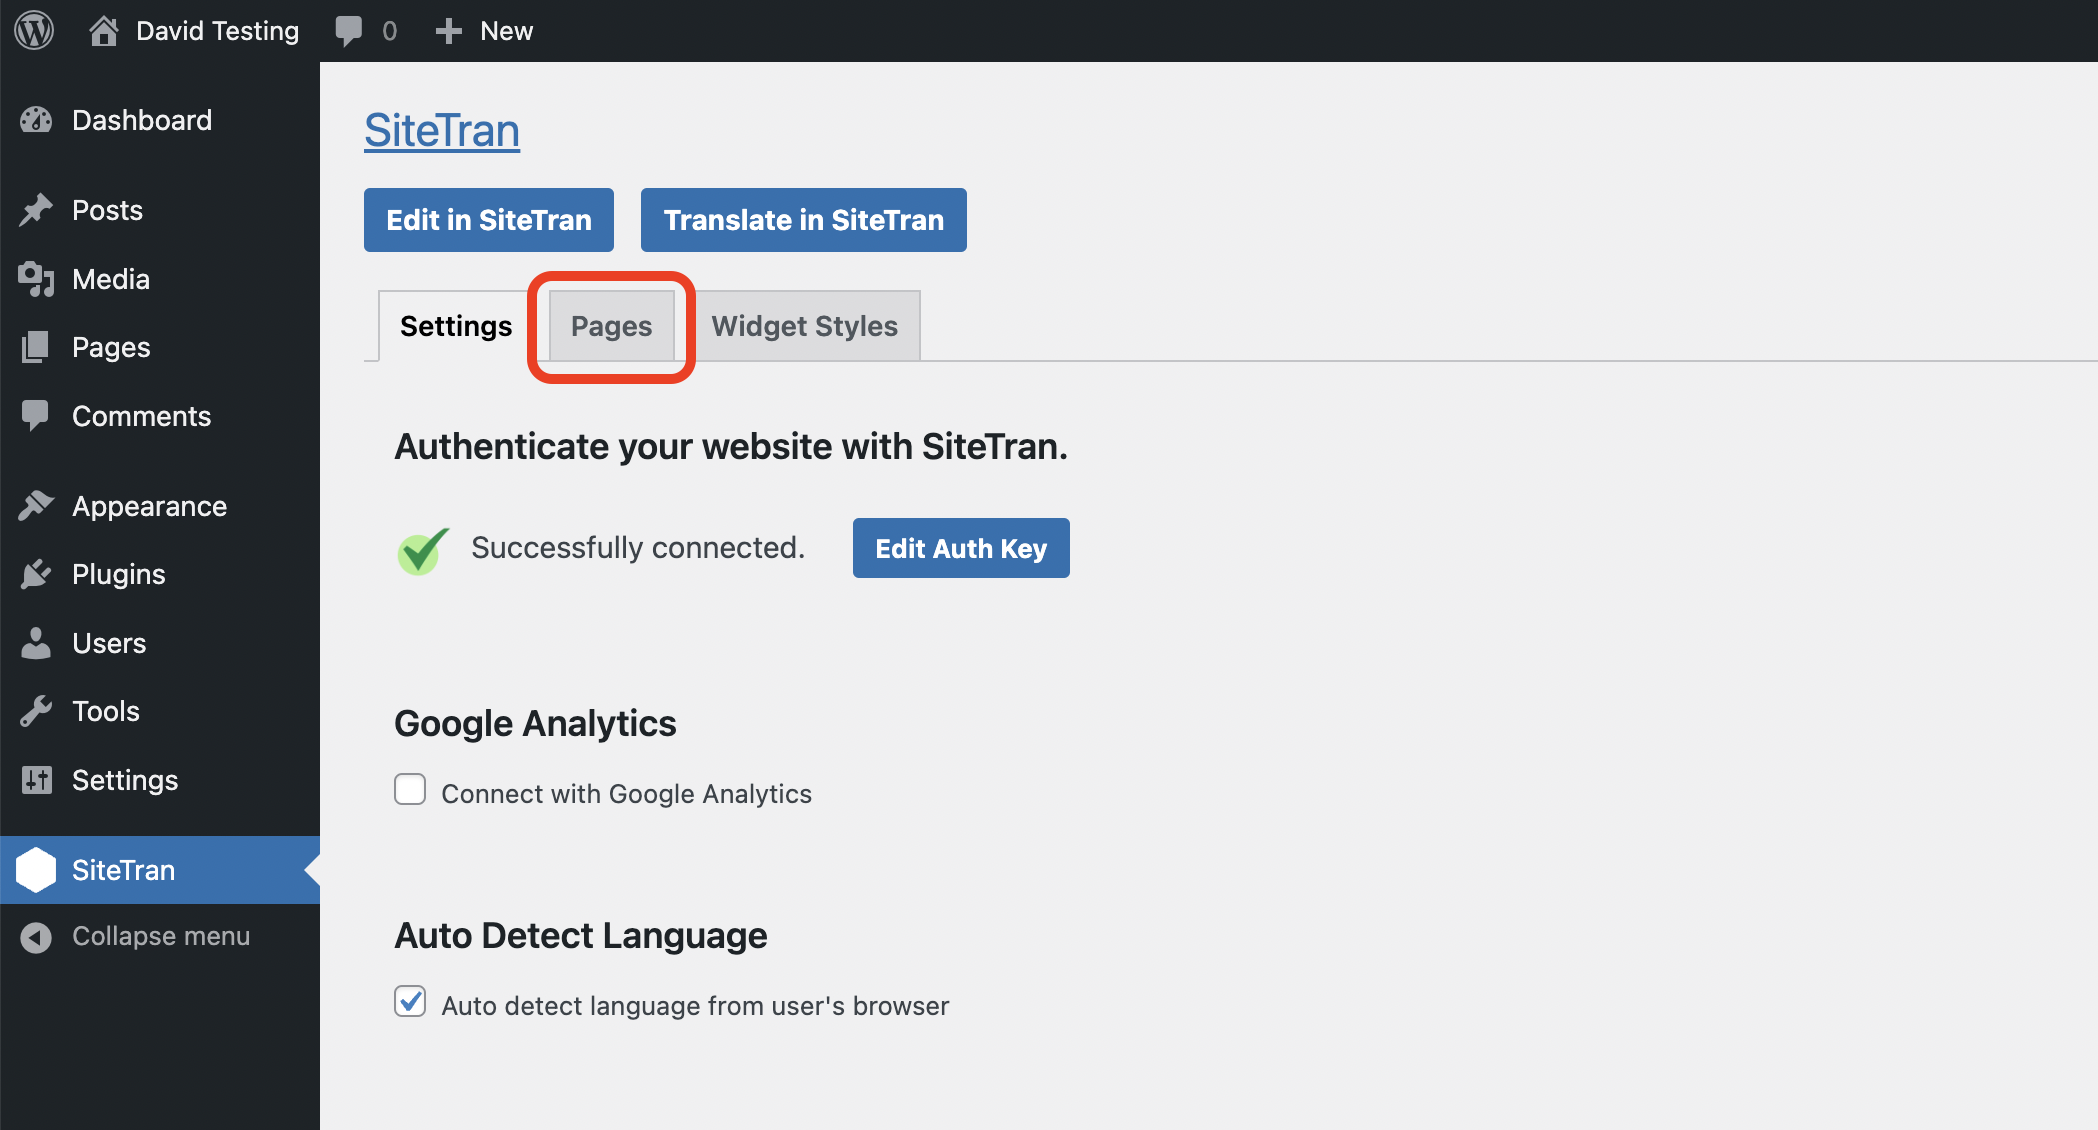
1) Navigate to the "Pages" panel
Inside your SiteTran admin interface, click on "Pages" to navigate to the "Pages" panel.
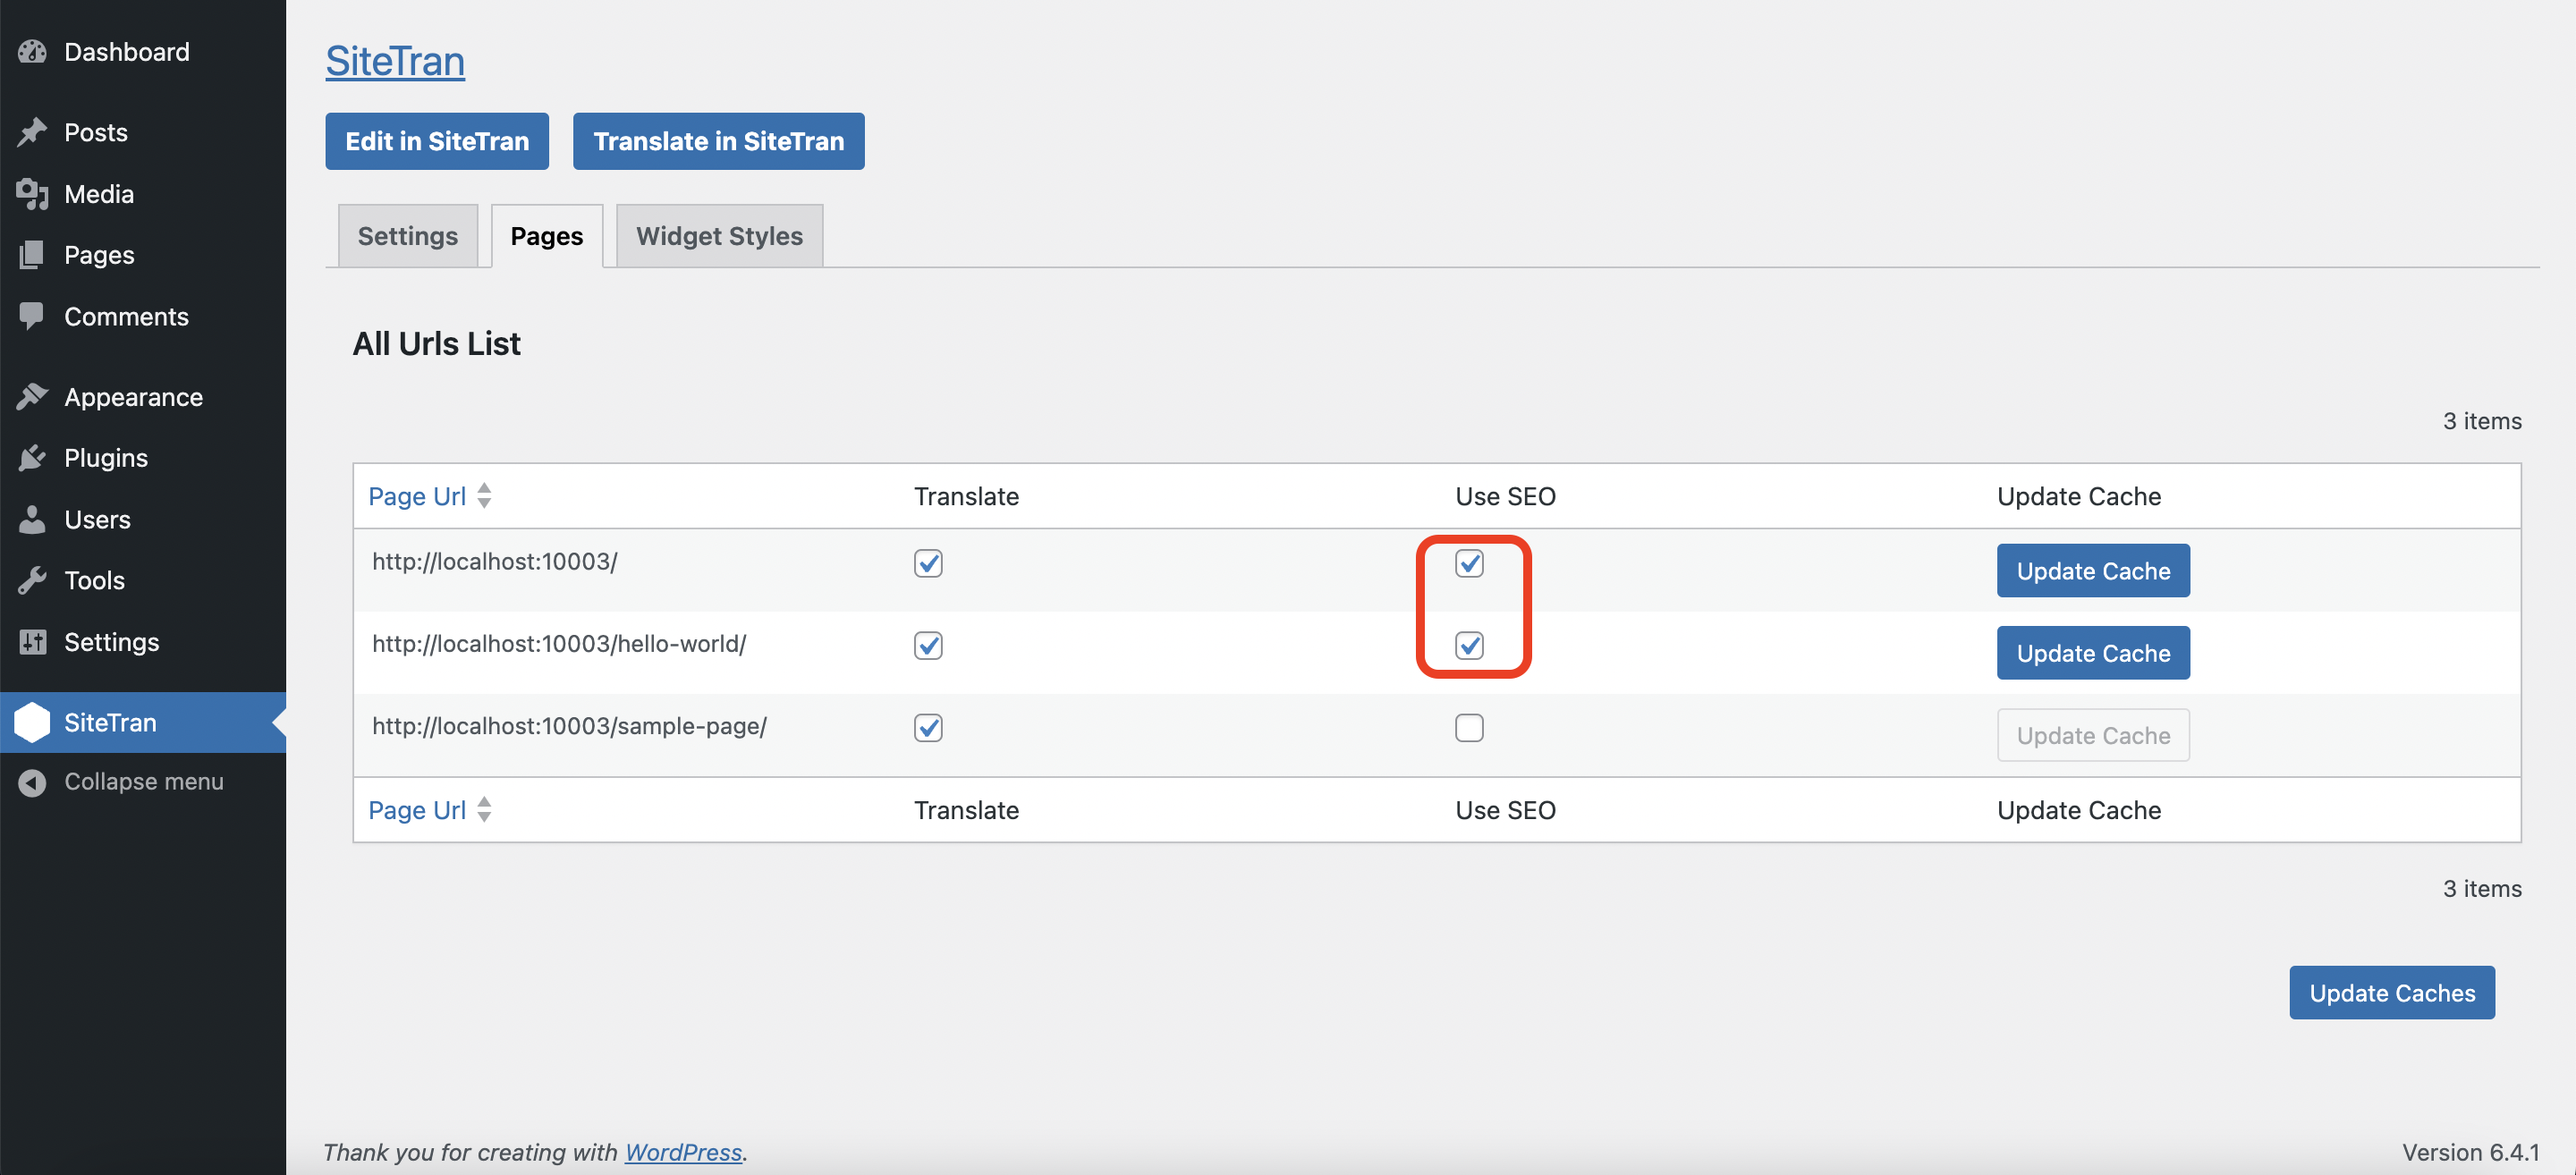
2) Enable SEO for the desired pages
Once inside your "Pages" panel, notice the "Use SEO" column in the "All Urls List" table:

Use this column to turn on SEO for the pages you want SEO enabled on.
1) Updating the Cache
Enabling SEO for a page generates a static file with the translations. If you add translations to a page after enabling SEO, the cache for that page needs to be updated so that your latest changes are added to the page.
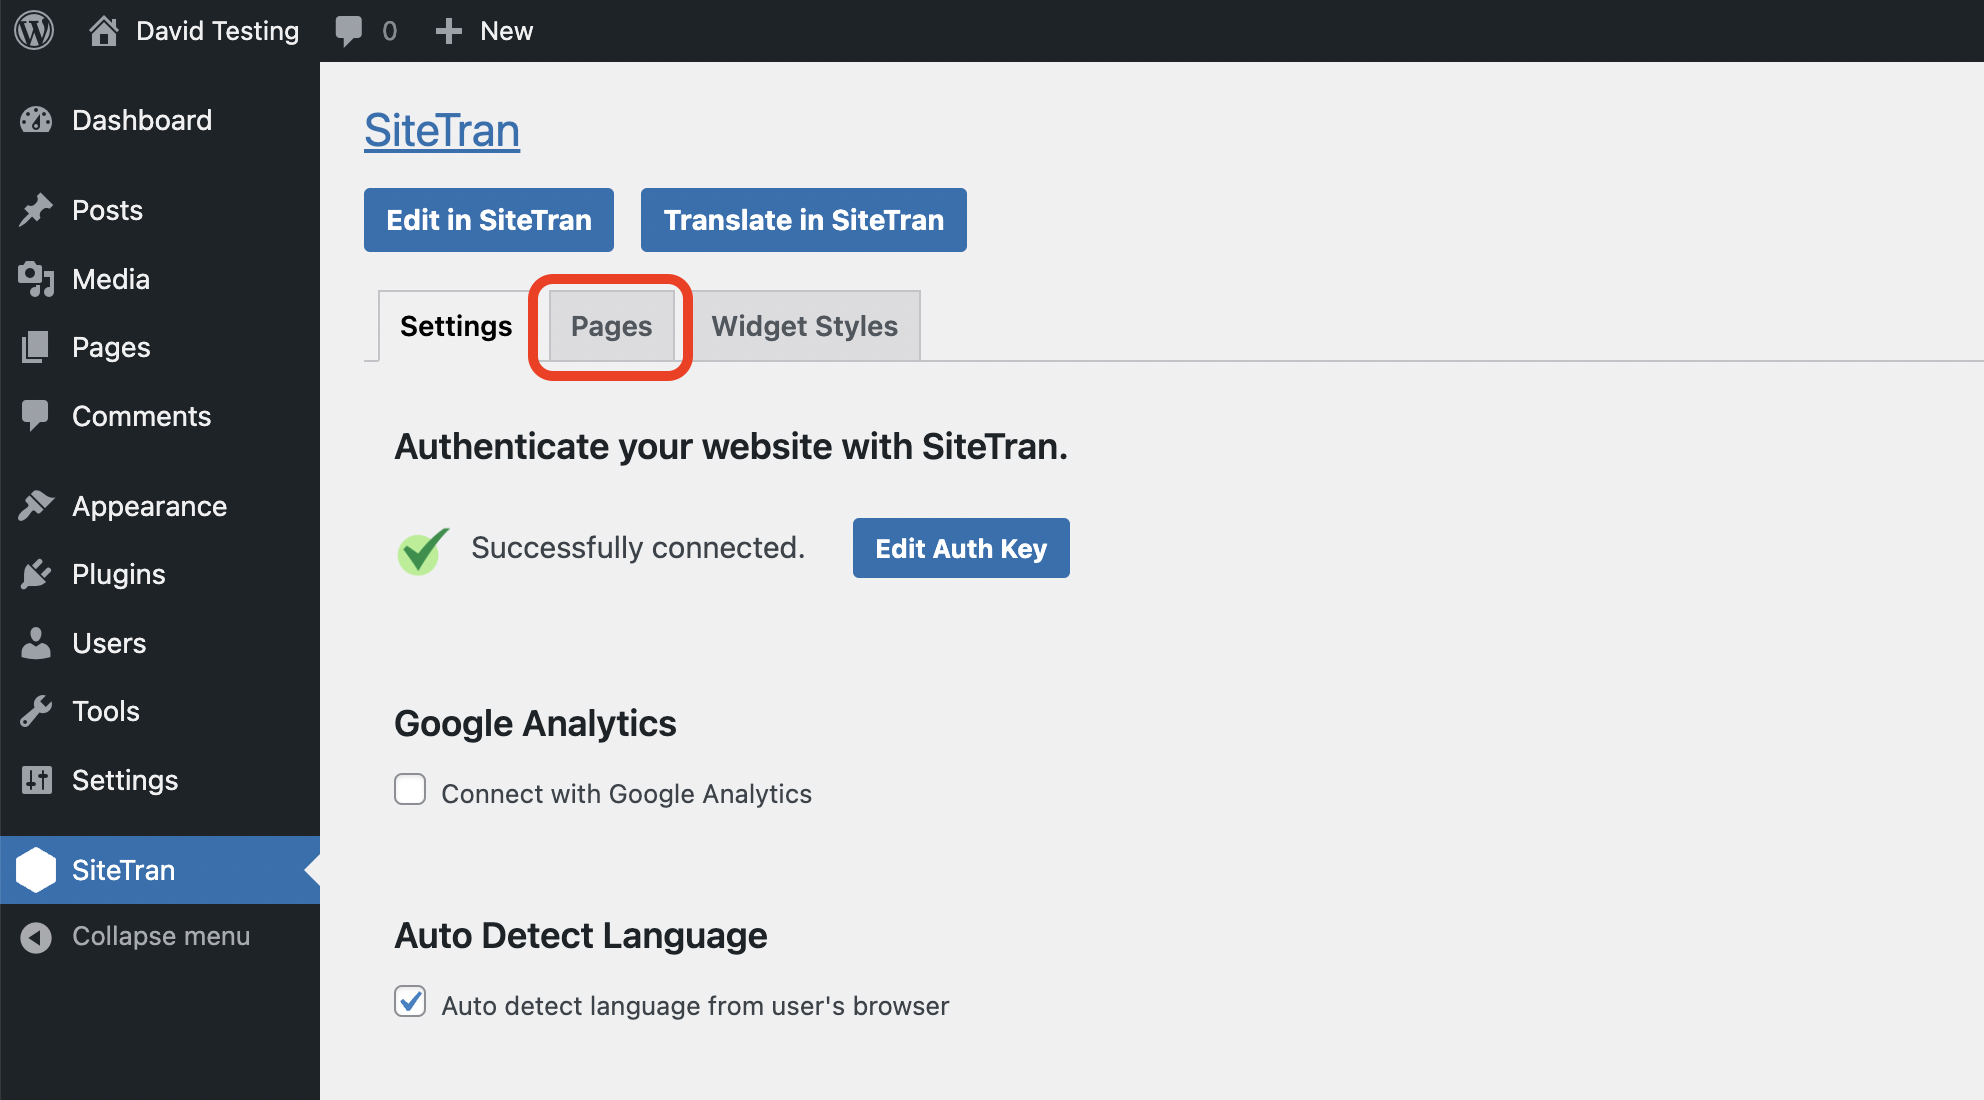
To do so, first, navigate to the "Pages" tab in the SiteTran plugin admin site.
Once inside the "Pages" tab, click on the "Update Cache" button for the pages that need to be updated with the newly added translations.
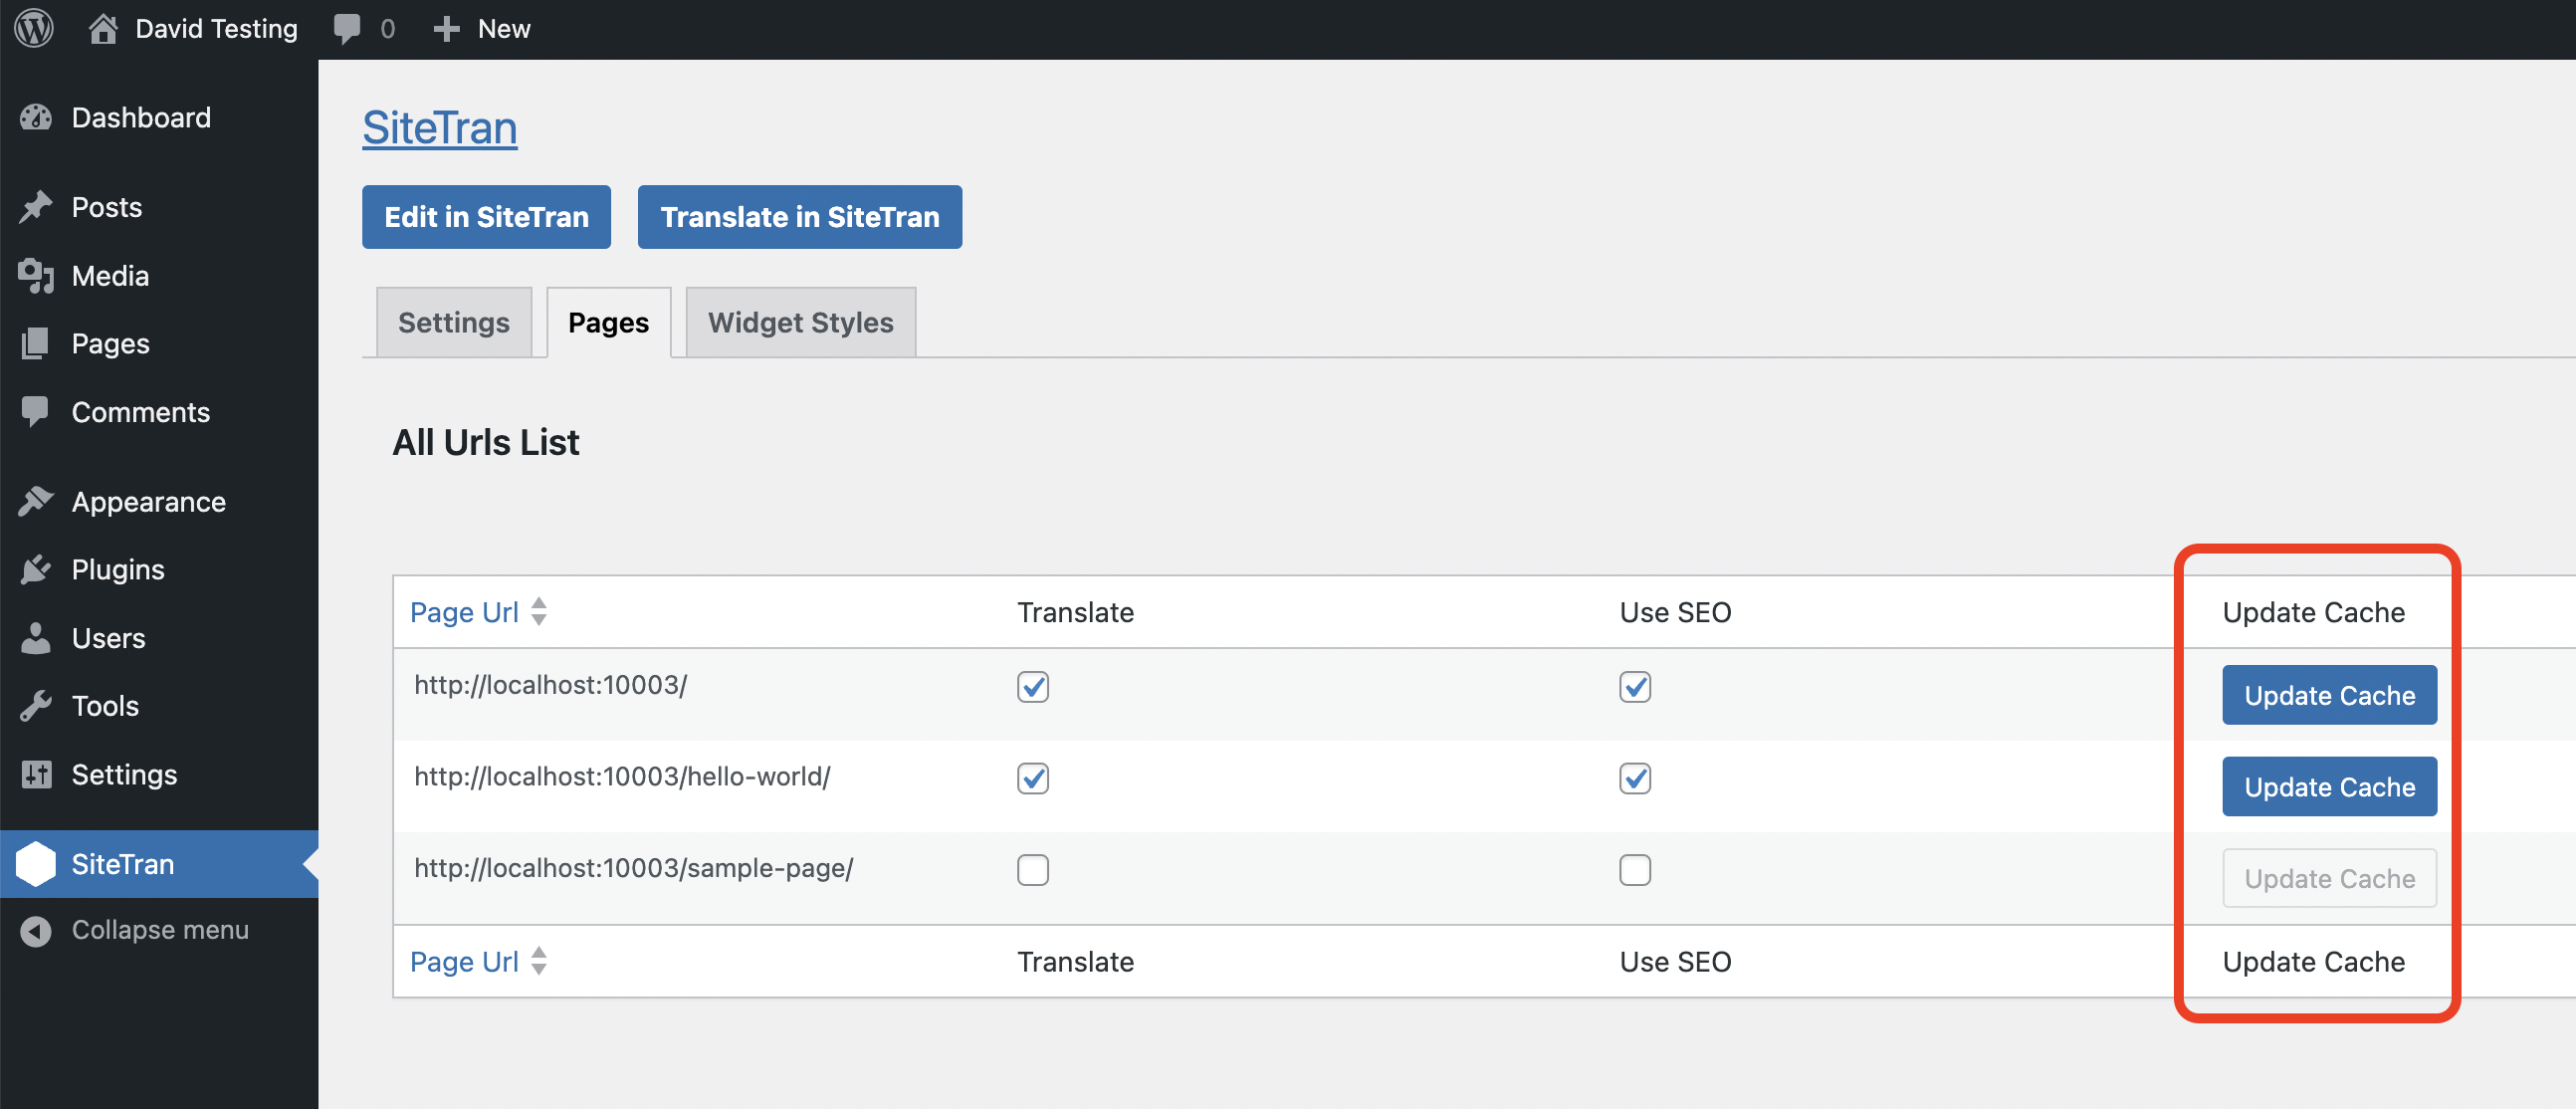
This will update the content of the pages.


